This Cherry Cheesecake Dump Cake is a rich and creamy dessert layered with sweet cherries, smooth cheesecake filling, and buttery cake topping. It’s incredibly easy to make with simple ingredients and minimal prep.
Perfect for family desserts, holidays, or when you need a quick and delicious treat everyone will love.
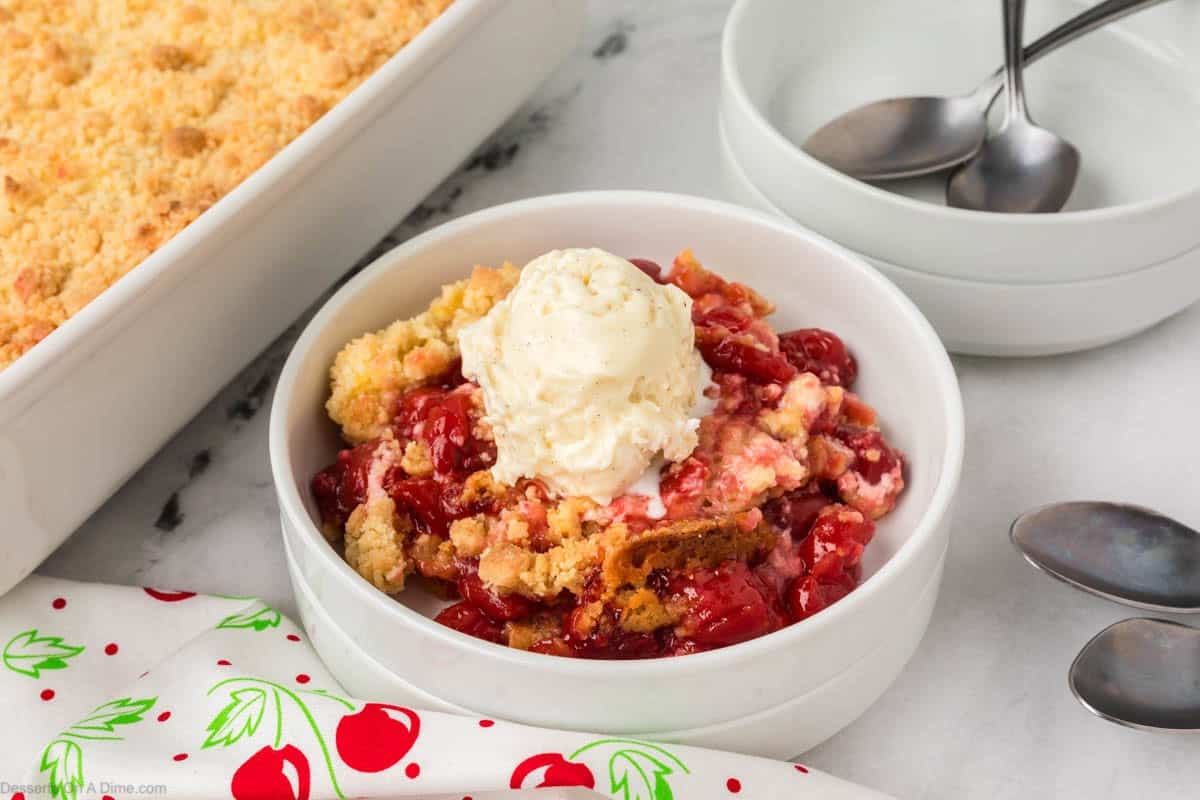
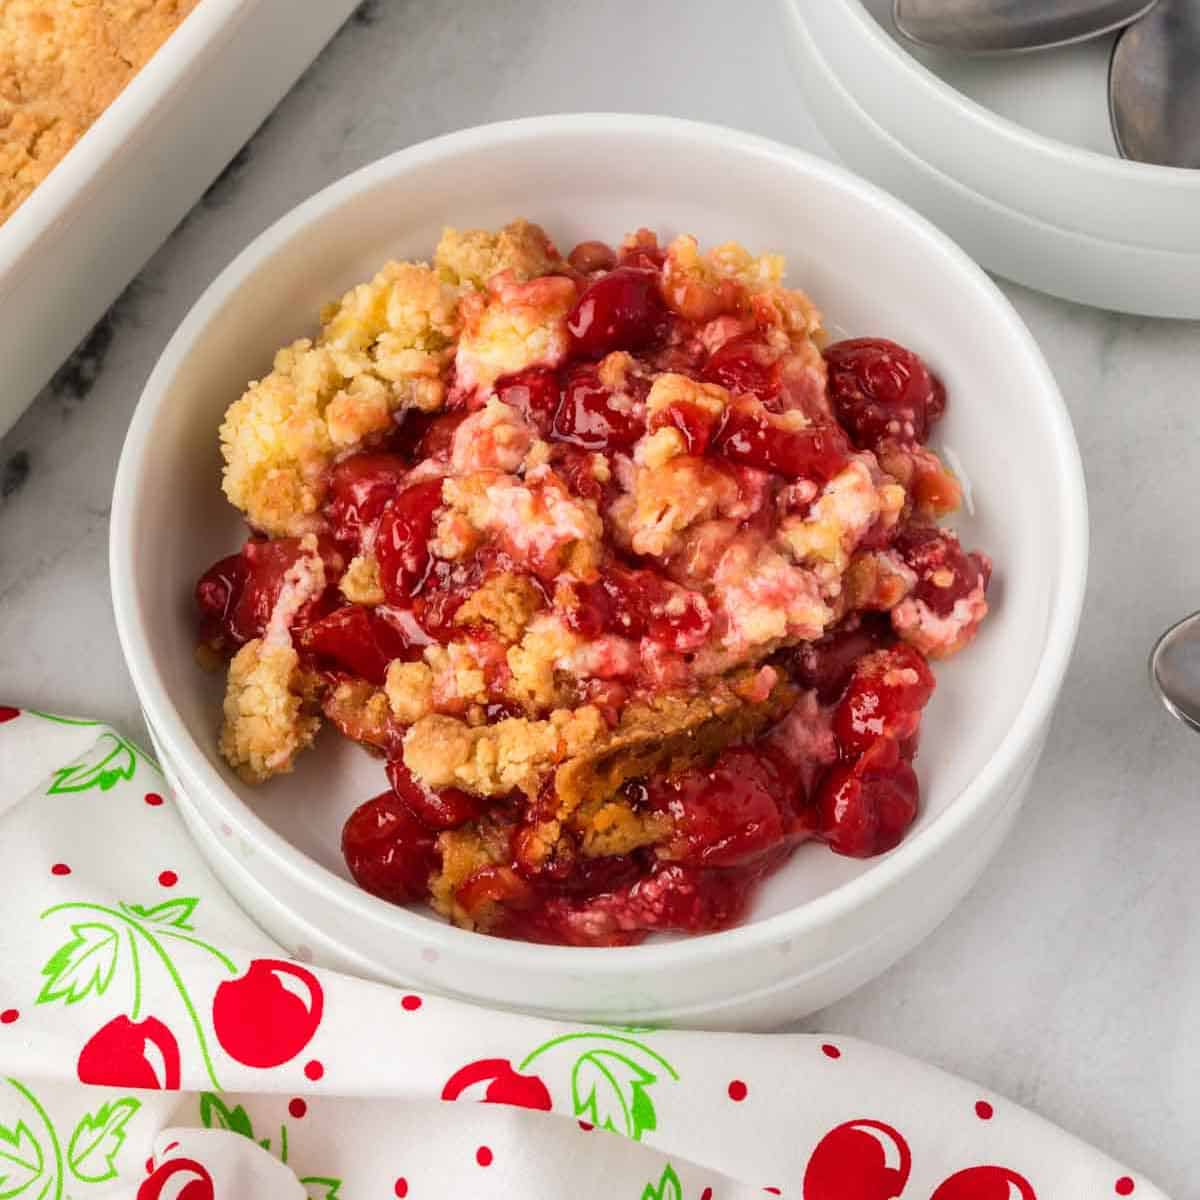
Cherry Cheesecake Dump Cake is the kind of dessert that feels special without requiring a lot of effort. It layers bold cherry flavor with a creamy, tangy cheesecake center and a golden, buttery topping for the perfect balance of textures.
Whether you’re baking for family, guests, or just yourself, this recipe delivers big flavor with very little work. If you love cheesecake desserts, also try Cheesecake Fluff and Mini Cheesecake Bites.
Why We Love This Recipe
- Super simple: Just layer the ingredients—no complicated steps required.
- Perfect flavor combo: Sweet cherries, creamy cheesecake, and buttery cake in every bite similar to cobbler.
- Minimal prep: Great for busy days when you need an easy dessert.
- Comforting and cozy: Best served warm for a rich, satisfying treat.
- Great for any occasion: Works for weeknights, holidays, or last-minute gatherings.
- Crowd favorite: Always a hit with family and friends.
Ingredients
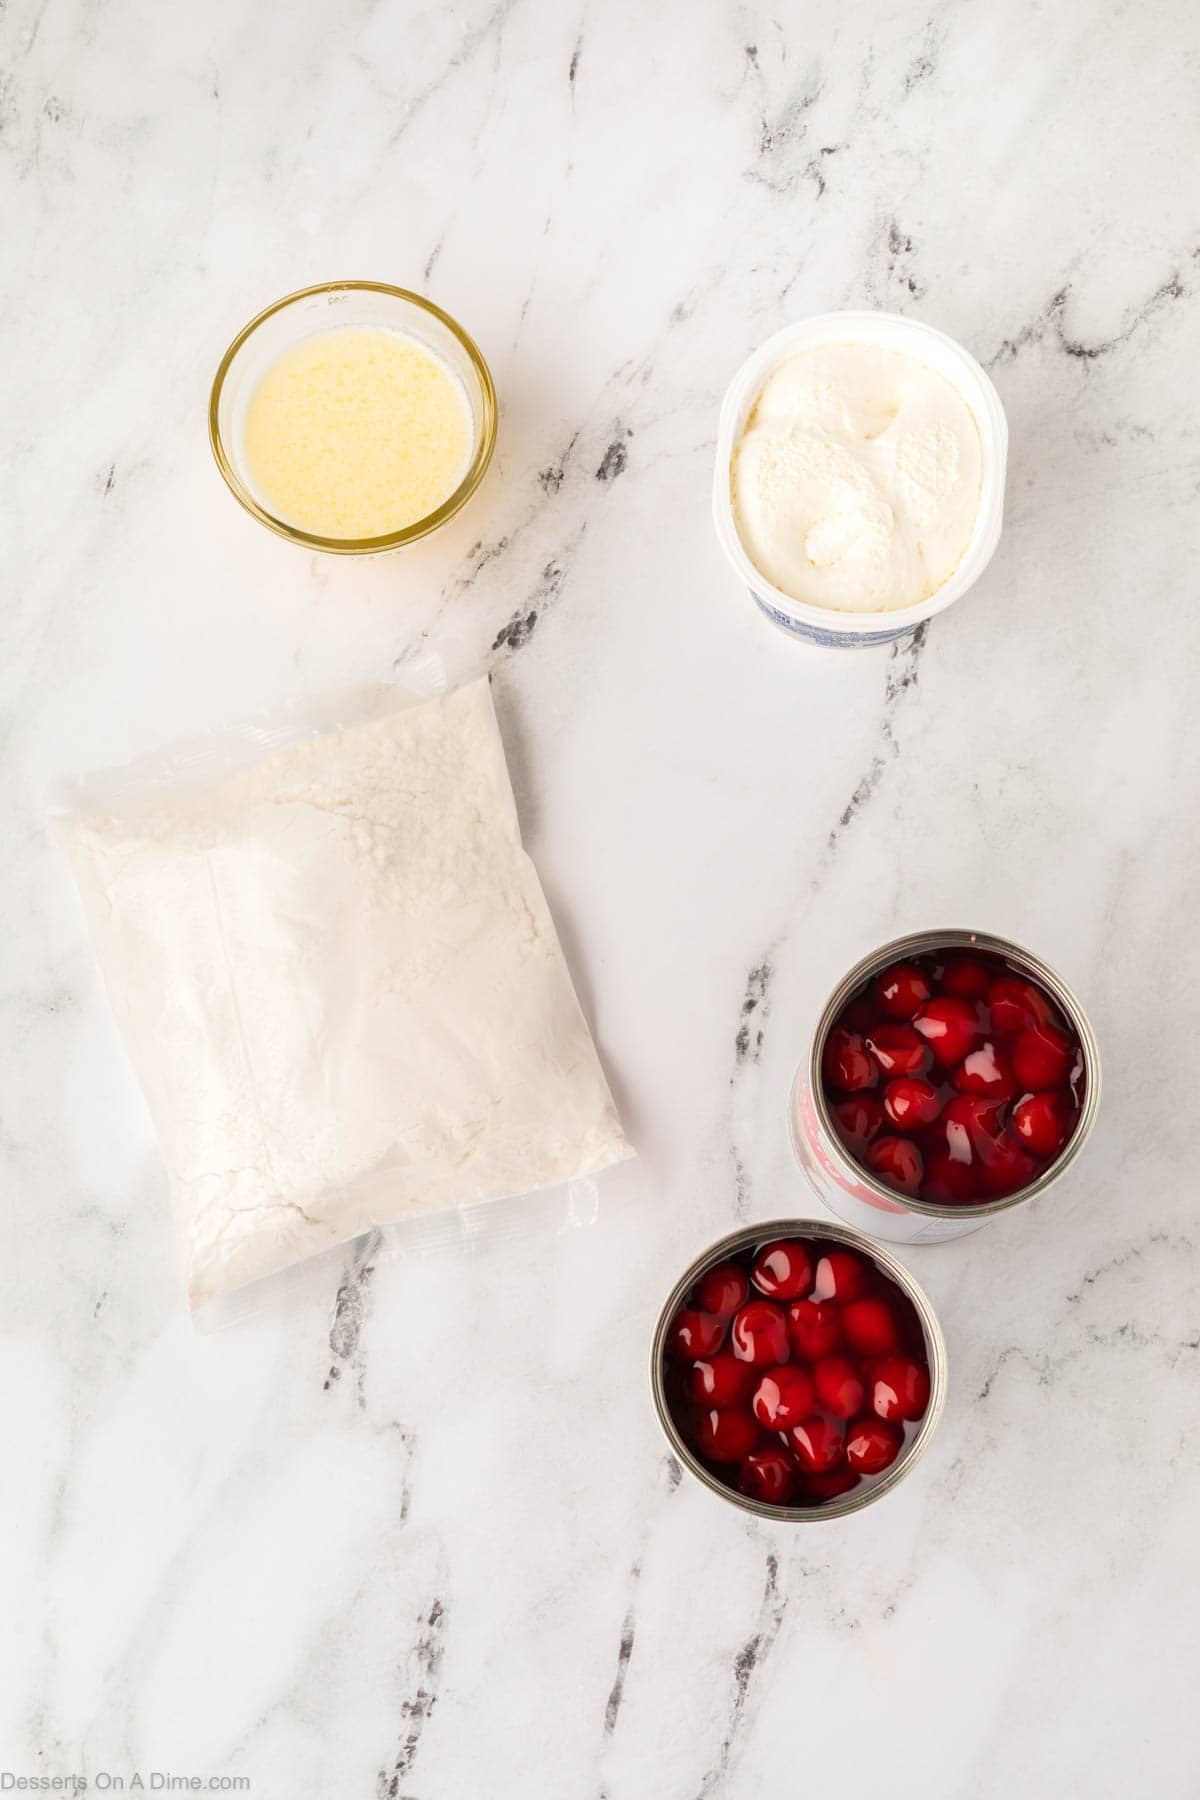
Ingredients
- Cherry Pie Filling
- Whipped Cream Cheese
- Yellow Cake Mix (dry)
- Butter
Step By Step Instructions
- Step 1. Go ahead and preheat the oven to 350°F. Then lightly grease a 9×13-inch baking dish with cooking spray.
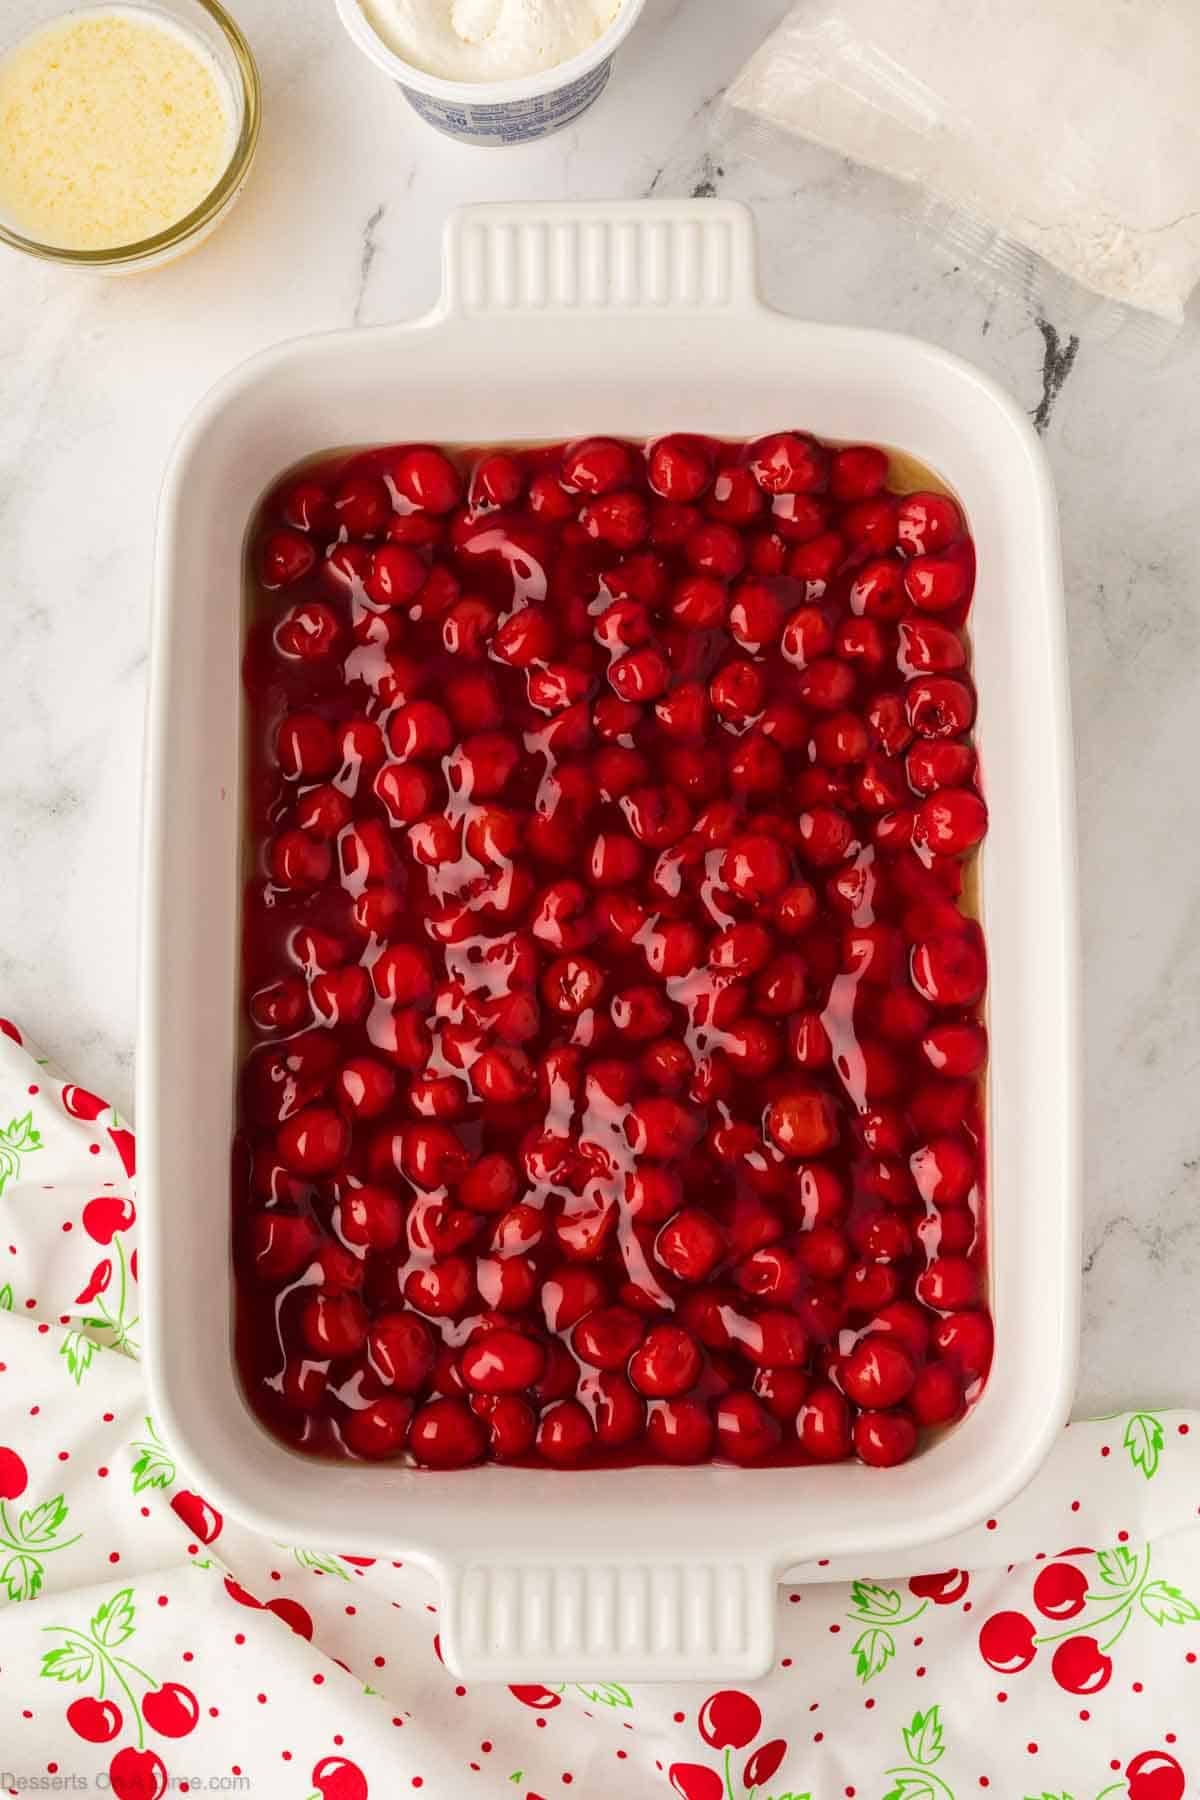
Step 2. Spread both cans of cherry filling into the baking dish evenly.
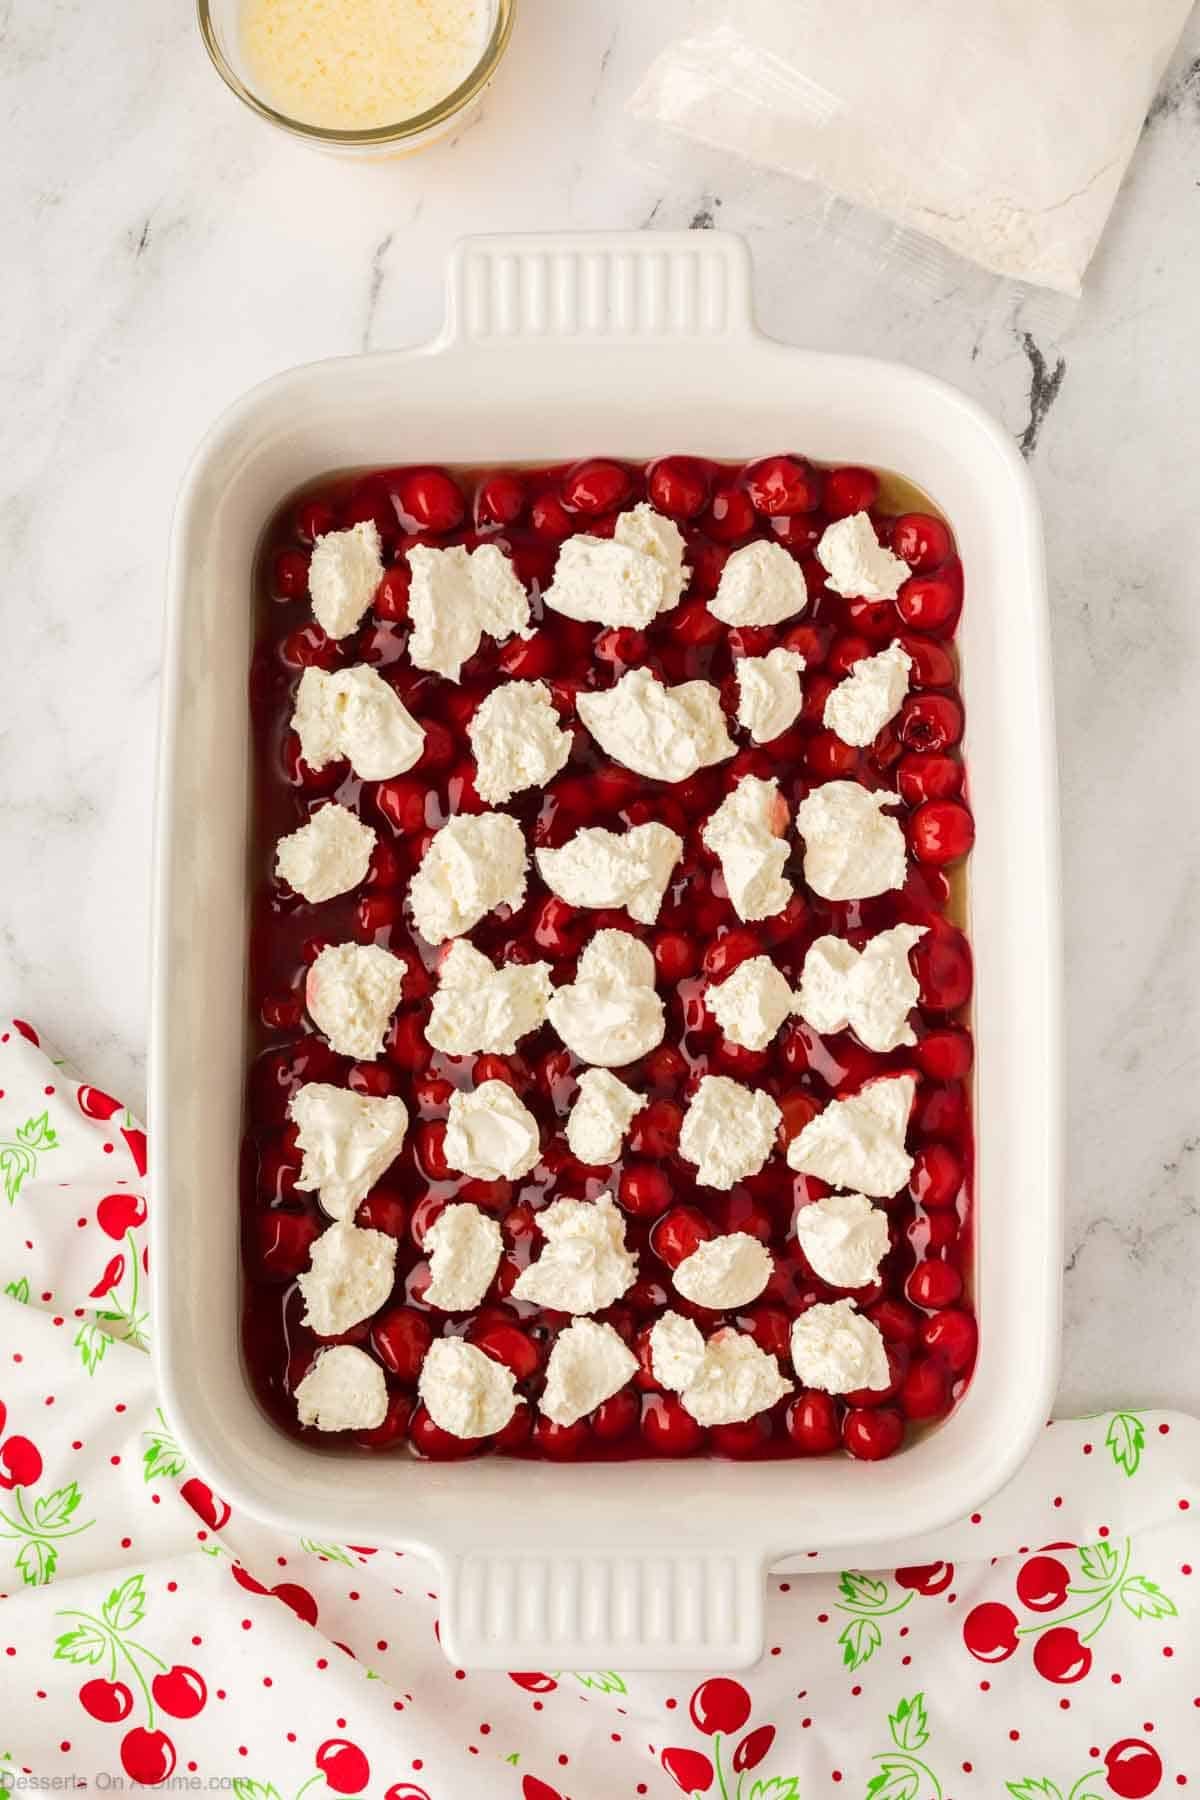
Step 3. Next, spoon small dollops of whipped cream cheese in an even layer on the berries.
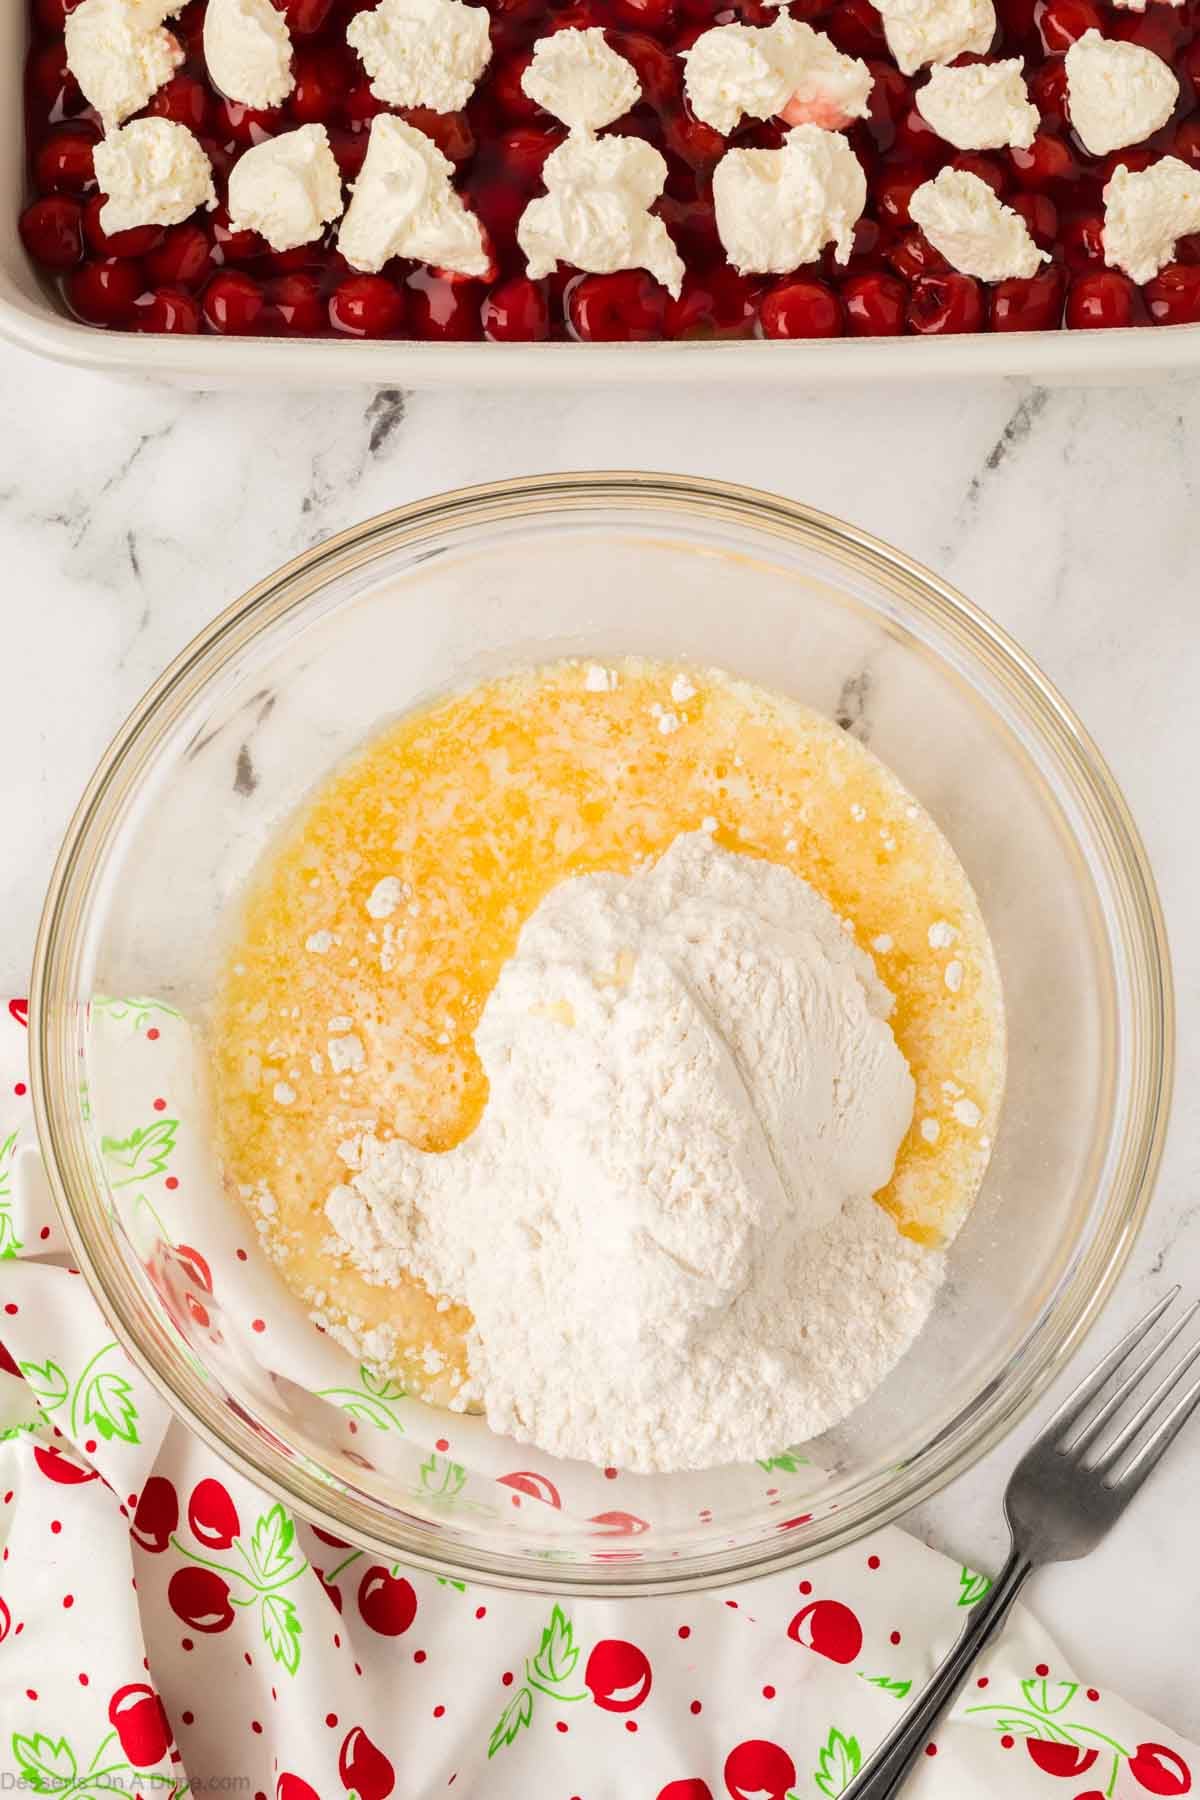
Step 4. Use a mixing bowl to combine dry cake mix with melted butter. Mix with a fork. The texture will be crumbly.

Step 5. Once combined, sprinkle the cake mix and butter mixture over the cream cheese layer.
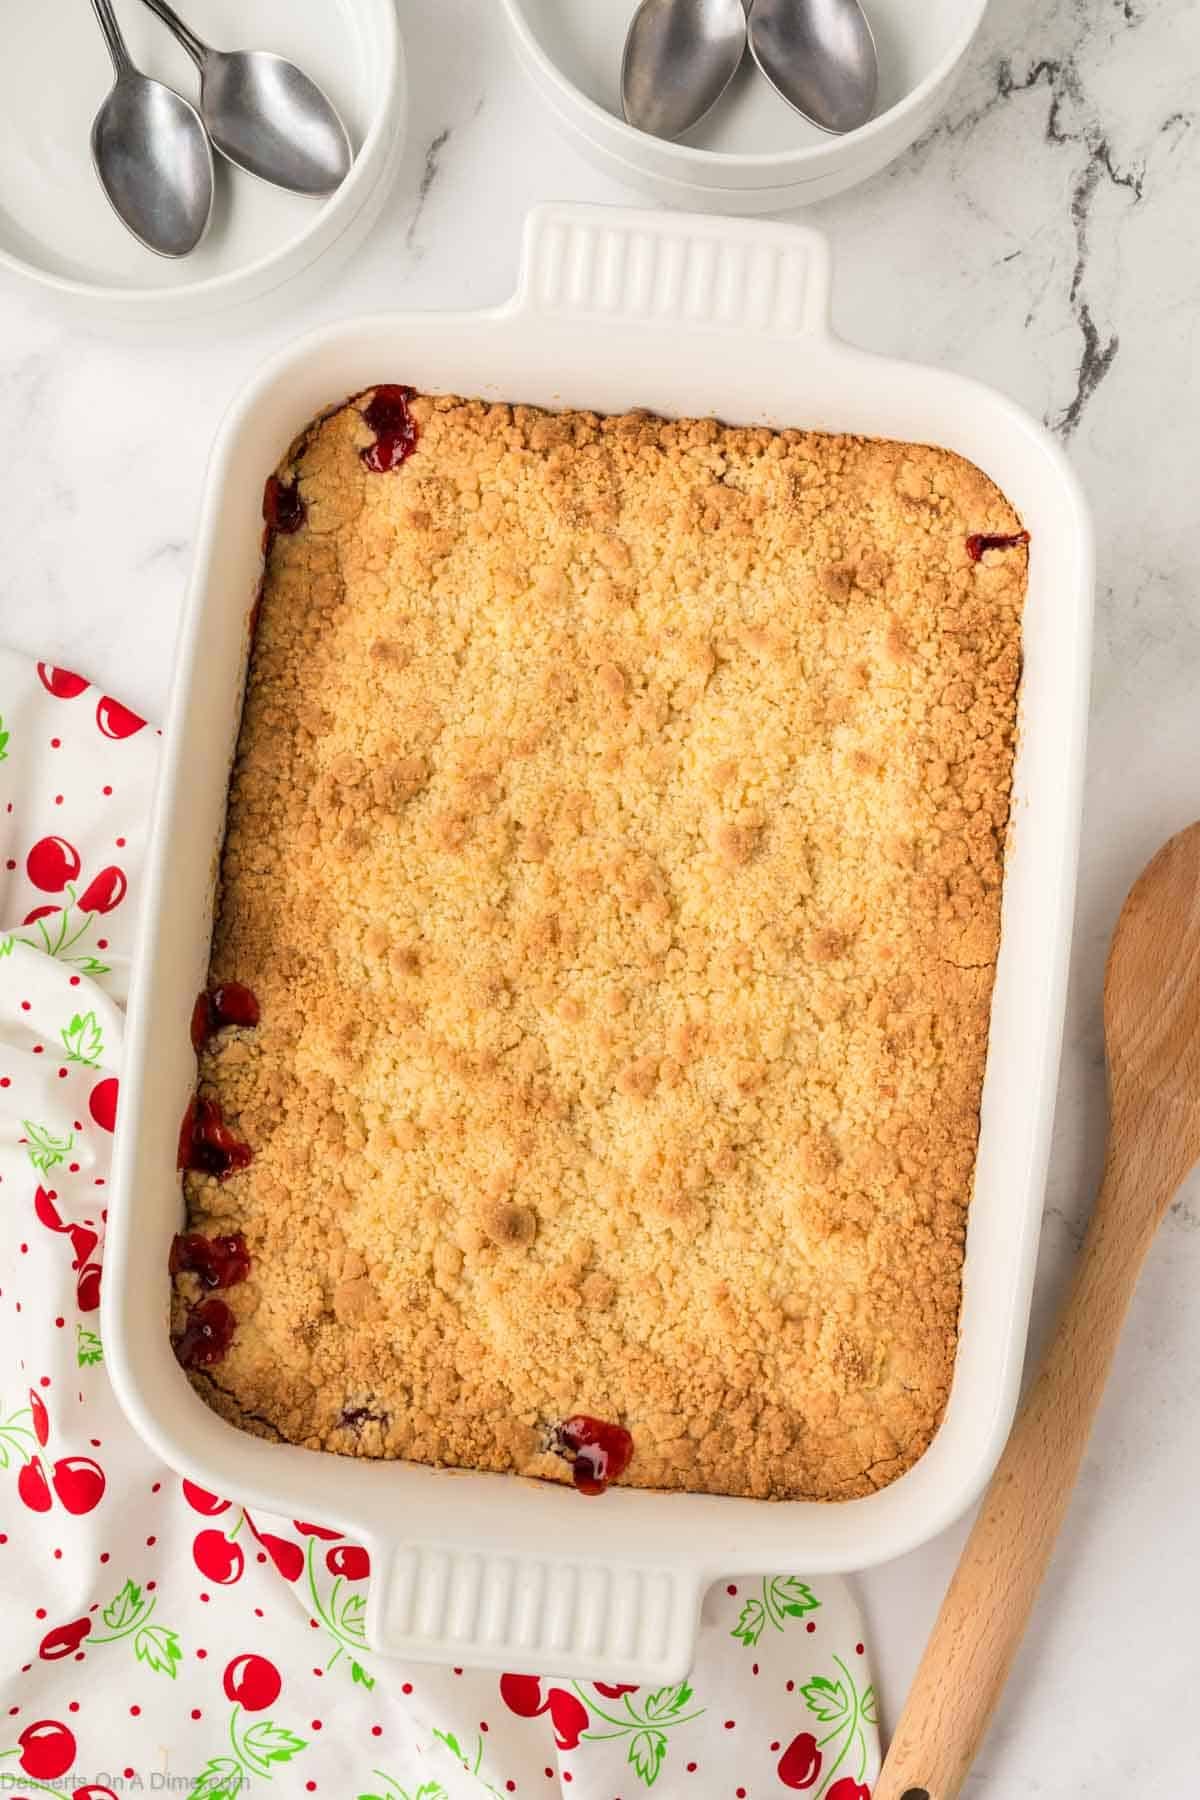
Step 6. Allow the cake to bake for 40–50 minutes. The top should be lightly golden brown.
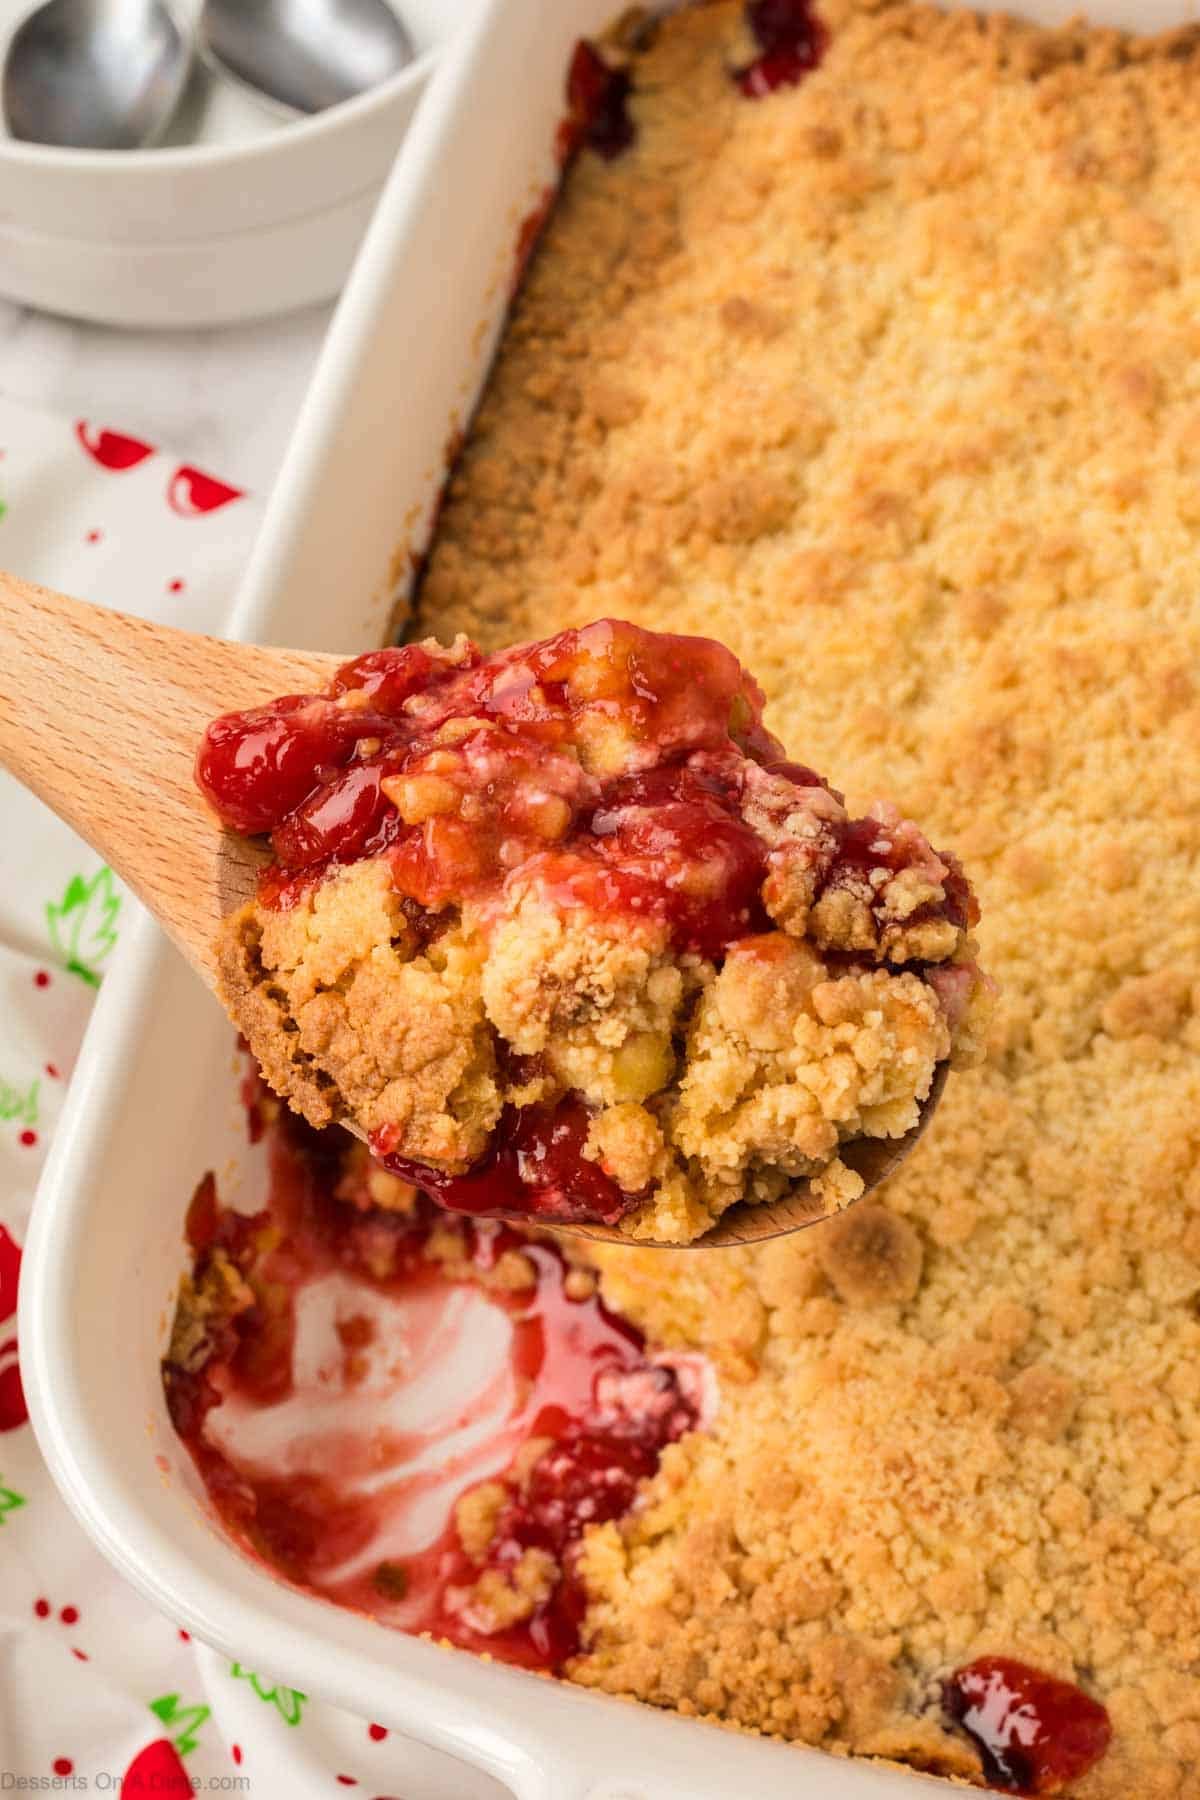
Step 7. Remove from the oven. Let the cake cool slightly before serving.
Pro Tips
- Use full-fat ingredients: Full-fat cream cheese and regular pie filling give the richest flavor and best texture. Low-fat versions can make the dessert watery.
- Don’t mix the layers: After assembling, avoid stirring. Keeping the layers separate creates that perfect combination of a fruity base and crumbly topping.
- Watch baking time: Bake just until the top is golden brown. Overbaking can make the topping too hard instead of soft and crumbly.
- Evenly spread ingredients: Distribute the cake mix and butter evenly to ensure consistent texture throughout.
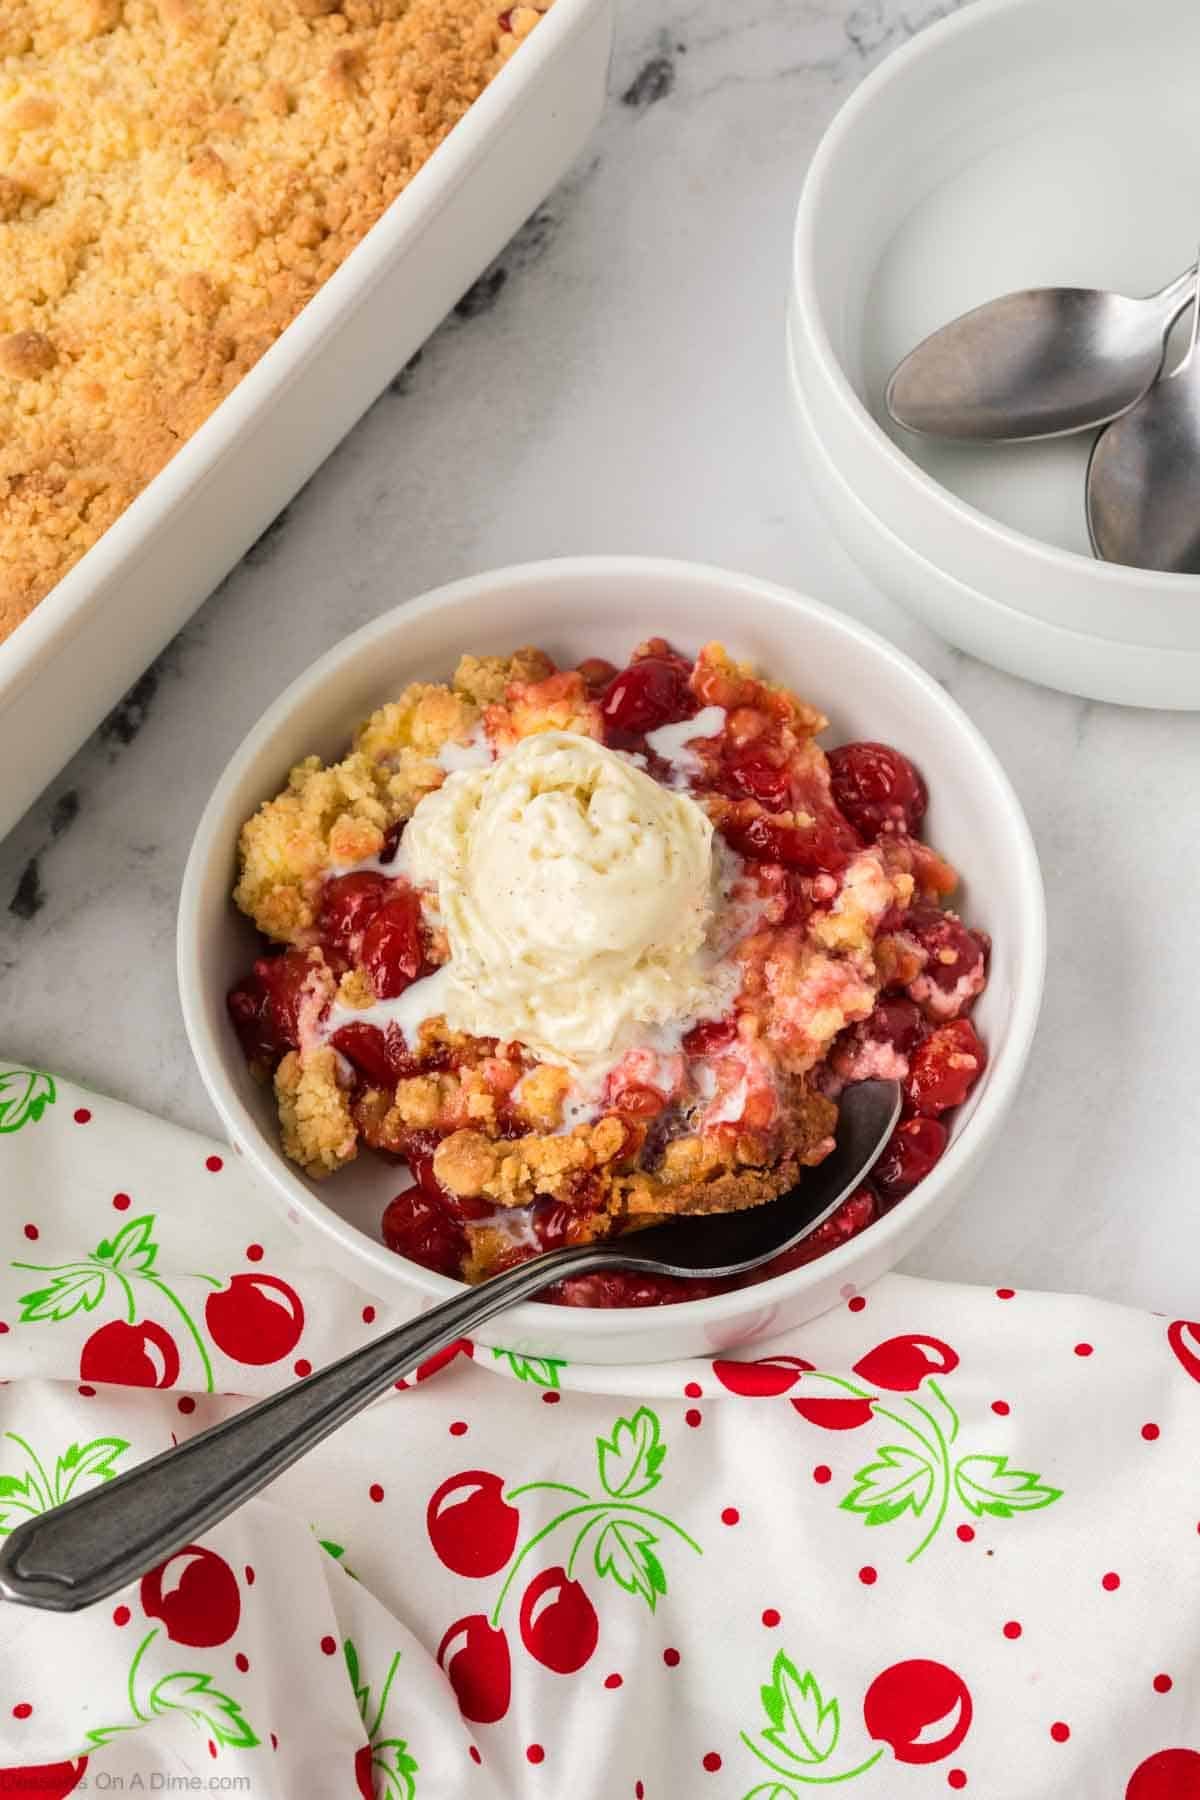
- Serve warm or cooled: It’s delicious warm with a scoop of ice cream or chilled for a firmer texture.
Storage
- Refrigerate: Store leftovers in an airtight container or cover the baking dish tightly with plastic wrap or foil.
- Shelf life: Keeps well in the refrigerator for up to 4–5 days.
- Reheat: Warm individual portions in the microwave for a cozy, just-baked taste.
More Easy Dump Cake Recipes
- Carrot Cake Dump Cake
- Pineapple Dump Cake
- Lemon Dump Cake
- Cherry Pineapple Dump Cake
- Easy Chocolate Dump Cake
Give this Cherry Cheesecake Dump Cake a try for an easy, crowd-pleasing dessert that’s full of flavor! Make it for your next gathering or sweet craving, and don’t forget to leave a review and star rating to let others know how much you loved it!
Cherry Cheesecake Dump Cake
Ingredients
- 2 20 oz cans cherry pie filling
- 8 oz whipped cream cheese
- 1 box yellow cake mix dry
- ½ cup butter melted
See how we calculate recipe costs.
Instructions
- Preheat oven to 350°F (175°C). Lightly grease a 9×13-inch baking dish with nonstick cooking spray.
- Pour 2 (20 oz) cans of cherry pie filling into the prepared baking dish and spread evenly.
- Spoon small dollops of 8 oz whipped cream cheese evenly over the cherry pie filling.
- In a bowl, combine 1 box dry yellow cake mix with ½ cup melted butter. Mix with a fork until a crumbly texture forms.
- Evenly sprinkle the cake mix and butter mixture over the cream cheese layer.
- Bake for 40–50 minutes, or until the top is lightly golden brown.
- Remove from the oven and let cool slightly before serving.

Looking forward to making this. Can you use any pie filling? Thinking of doing 1 in apple and 1 in peach each in a 8 x 8 pan. Will this work?
Carol – Yes, feel free to use any pie filling you love. Please come back and let us know how it turned out.