Indulge in Cheesecake Brulee, a rich and creamy dessert with a perfectly caramelized top. Easy to make yet elegant, it’s perfect for dinner parties, special occasions, or treating yourself to something extraordinary.
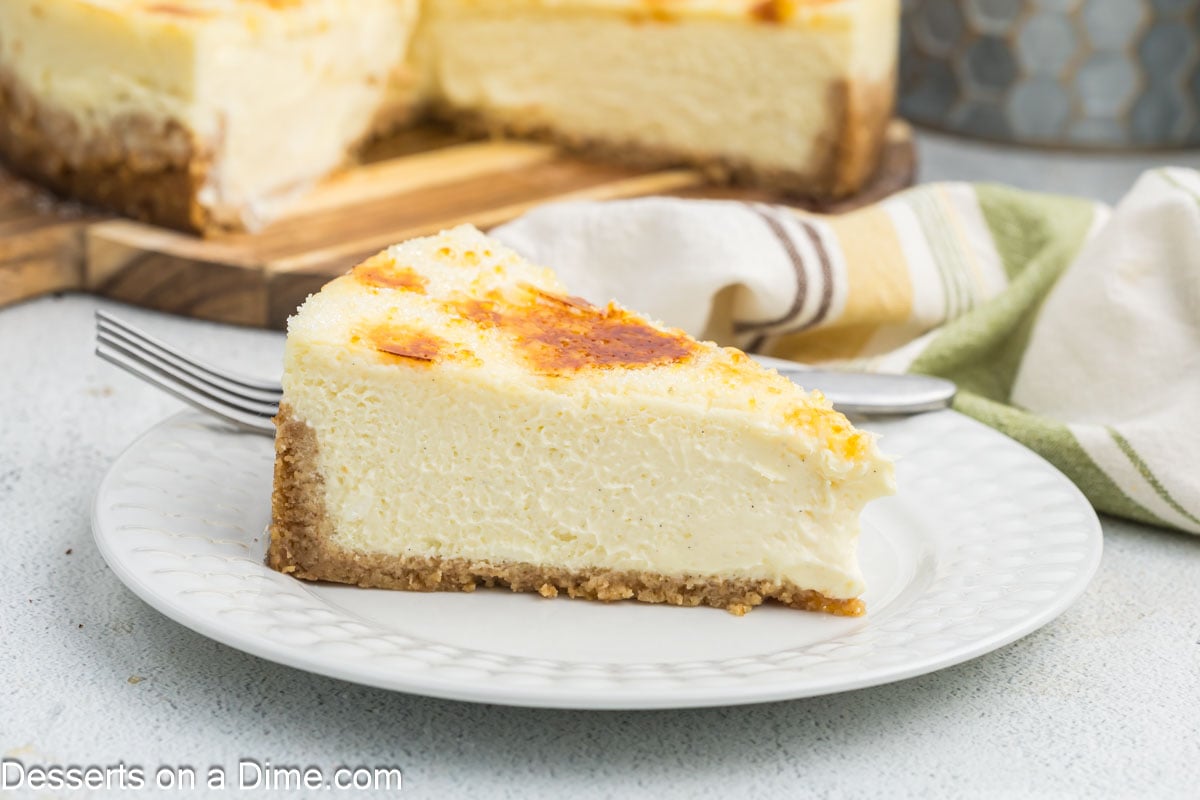
Cheesecake Brulee is a luxurious dessert that combines the creamy richness of classic cheesecake with a perfectly caramelized, crisp sugar topping. This elegant treat looks impressive but is surprisingly easy to make, making it ideal for dinner parties, special occasions, or whenever you want a decadent dessert that tastes as amazing as it looks.
This recipe combines two of my favorite desserts. If you love classic Cheesecake recipes, this dessert is a delicious variation of creamy cheesecake filling and crunchy sugar topping. It really elevates dessert for an instant hit. Give it a try and you will see why I have been making this for years.
I love making cheesecake for any occasion and often make Cookies and Cream Cheesecake, Cheesecake Brulee, Banana Cream Cheesecake and Honey Bun Cheesecake. Another favorite is Lemon Blueberry Cheesecake Recipe, Mini Cheesecake Bites and Key Lime Cheesecake. I also love Butter Pecan Cheesecake, Cheesecake Fluff and Mini Easter Cheesecakes.
If you prefer the slow cooker, try Crockpot Cheesecake.
Table of contents
Why We Love This Recipe
- Creamy and indulgent: Smooth, rich cheesecake paired with a crisp caramelized top.
- Elegant presentation: The brûlée finish adds a sophisticated touch for special occasions.
- Easy to make: Surprisingly simple recipe for such a luxurious dessert.
- Perfect portion size: Individual servings make it easy to serve and enjoy.
- Versatile flavors: Can be flavored with vanilla, citrus, or even chocolate for variety.
- Crowd-pleasing: A dessert that impresses both in taste and appearance.
- Make-ahead friendly: Can be prepared in advance and finished just before serving.
Ingredients

Crust
- Graham Cracker Sheets. Use regular honey grahams to make the crust.
- Butter. Melted butter.
- Brown Sugar. Gives the crust the perfect amount of sweetness. You can also make Homemade Brown Sugar Recipe.
Cheesecake Layer
- Cream cheese: Softened at room temperature for smooth, lump-free batter.
- Vanilla bean pods: Fresh vanilla beans provide a rich, aromatic flavor that enhances the cheesecake.
- Eggs: Large, room-temperature eggs help create a creamy, stable texture.
- Heavy whipping cream: Cold cream adds richness and contributes to a silky smooth consistency.
- Sour cream: Full-fat sour cream gives the cheesecake a tangy flavor and creamy texture.
Topping
- Granulated Sugar. This simple ingredient will mak the perfect topping.
Get the complete list of ingredients at the bottom of the page in the recipe card.
Substitutions and Variations
- Crust options: Instead of traditional graham crackers, try vanilla wafers, tea biscuits, or cinnamon graham crackers for a unique twist.
- Vanilla alternatives: Use vanilla bean paste or pure vanilla extract if you don’t have vanilla bean pods. If using paste, mix it in with the sour cream for even flavor distribution.
- Chocolate variation: Add a layer of melted chocolate or chocolate cookie crust for a decadent twist.
- Citrus flair: Incorporate lemon or orange zest into the batter for a bright, refreshing flavor.
Step By Step Instructions
Step 1. First, preheat the oven to 325 degrees Fahrenheit.

Step 2. Make the crust by crushing the graham cracker sheets in a food processor. The texture of the graham cracker crumbs should be fine crumbs. Mix together the crust ingredients in a mixing bowl. You can also add kosher salt to enhance the flavor.

Step 3. Spread the mixture into the bottom of a 9-inch springform pan. Press the mixture up the sides of the pan about ½ inch. Bake for 8 minutes. Then allow to cool at room temperature.

Step 4. Now, make the cheesecake batter in a large mixing bowl. Beat the cream cheese with an electric mixer until soft. If you are using a stand mixer, use the paddle attachment. Mix in the sugar until combined. Scrape down the sides of the bowls. Split open the vanilla bean pods with a small knife and scrape the seeds from the pods into the bowl with the cream cheese mixture. Beat until well combined.

Step 5. Slowly add in the eggs, one at a time, until each egg is fully combined. Be careful not to over mix.

Step 6. Keep the mixer speed on low and mix in the sour cream, heavy cream and salt until thoroughly combined. You can use a stand mixer or hand mixer.

Step 7. Spread the batter over the crust. Smooth it out as much as possible with a spatula. Wrap the bottom of the pan with a few layers of aluminum foil.
- Step 8. Create a water bath and place the pan into a large roasting pan and pour boiling water around the cheesecake pan. Continue to add water until it goes up about halfway up the side of the cheesecake pan.
- Step 9. Bake the cheesecake for 55-65 minutes. The edges should be set, and the center should still appear jiggly.
- Step 10. Turn the oven off and crack the oven door. Let the cheesecake sit in the oven for 45 more minutes until the cheesecake has cooled to room temperature. Remove from the oven and carefully remove the cheesecake from the hot water.
- Step 11. Allow to chill in the refrigerator for at least 4 hours or overnight.
For Serving

Step 12. Carefully release the cheesecake from the springform pan.

Step 13. Finally, sprinkle the sugar on top. Then use a torch to caramelize the sugar on top of the cheesecake for the brulee topping. Make sure to keep the torch on the lowest setting to prevent the cheese cake from burning.

Step 14. Let the caramel layer harden by sitting for 5 minutes.

Step 15. Then the Cheesecake Brulee is ready to slice, serve and enjoy!
Storage
Refrigerate: Store cheesecake brûlée in an airtight container in the refrigerator for up to 4–5 days.
Avoid moisture: Keep the caramelized top covered loosely with foil or plastic wrap to prevent it from becoming soggy.
Serve chilled or room temperature: For best texture, serve straight from the fridge or allow to sit at room temperature for 10–15 minutes before enjoying.
Do not freeze: Freezing can alter the texture of the creamy cheesecake and the caramelized top.
Pro Tips
- Room temperature ingredients. Make sure to use room temperature ingredients to ensure that the cheesecake is creamy and smooth.
- Full Fat Cream Cheese. Use full fat cream cheese for the best flavor.
- Scrape the bowl. I like to scrape the bowl several times while mixing. This ensures everything is thoroughly combined and without lumps.
- Don’t overmix the batter. Overmixing will make the batter expand while baking and then it will deflate and crack.
- Allow to stay in the oven. If you skip this step, the top will break and not set.
- Allow to cool. Don’t rush the time the cheesecake needs to cool. This time is needed so it properly sets.
Frequently Asked Questions
It is a custard type dessert made with egg yolks, sugar and other simple ingredients.
If you do not have a blow torch, you can use the broiler. However, you risk the cheesecake getting warm and burning the top. It is much easier with a torch.

If You Love Cheesecake, Try These Recipes
- Cinnamon Roll Cheesecake
- Mini Red Velvet Cheesecake
- Cookie Butter Cheesecake
- Strawberry Cheesecake Cookies
- Chocolate Chip Cheesecake Dip
Treat yourself and your guests to this decadent Cheesecake Brulee! Try making it for your next dinner party or special occasion, and don’t forget to share your experience and leave a comment to let others know how delicious it turned out.

Cheesecake Brulee
Ingredients
For the Crust:
- 10 Graham Cracker Sheets
- 1/4 cup Butter melted
- 2 Tbsp Brown Sugar
For the Cheesecake Layer:
- 3 pkg Cream Cheese softened 8 oz each, room temperature
- 1 1/3 cup Granulated Sugar
- 2 Vanilla Bean Pods
- 4 Large Eggs room temperature
- 1 1/2 cups Heavy Whipping Cream
- 1/2 cup Full Fat Sour Cream
- 1/4 teaspoon Salt
For the Topping:
- 1/4 cup Granulated Sugar
See how we calculate recipe costs.
Instructions
For the Crust:
- Preheat the oven to 325 degrees Fahrenheit.
- Pulse the graham crackers in a food processor until they are fine crumbs. Mix together the crust ingredients in a mixing bowl.
- Press this mixture into the bottom of a 9 inch springform pan and press the mixture up the sides of the pan approximately ½ inch.
- Bake for 8 minutes and then cool at room temperature.
For the Cheesecake Batter:
- Beat the softened cream cheese with a hand held mixer or stand up mixer until soft and creamy.
- Mix in the granulated sugar for 1-2 minutes until combined. Scrape down the sides of the bowls as needed.
- Split open the vanilla bean pods with a small knife and scrape the seeds from the pods into the bowl with the cream cheese mixture. Beat for 2 minutes until well combined.
- Slowly add in the eggs, one at a time, until each egg is fully combined. Be careful not to over mix.
- Keep the mixer speed on low and mix in the sour cream, heavy cream and salt until both are thoroughly combined.
- Pour the cream cheese mixture over the crust. Smooth it out as much as possible with a spatula.
- Wrap the bottom of the pan with a few layers of foil.
- Place the pan into a large pan and pour boiling water around the cheesecake pan until it goes up approximately halfway up the side of the cheesecake pan.
- Bake for 55-65 minutes. The edges should be set and the center should still appear jiggly.
- Turn the oven off and crack the oven door. Let the cheesecake sit in the oven for 45 more minutes until the cheesecake has cooled to room temperature.
- Remove from the oven and carefully remove the cheesecake from the water.
- Chill in the refrigerator for at least 4 hours or overnight.
For Serving:
- Carefully release the cheesecake from the springform pan.
- Sprinkle the sugar on top and use a torch to caramelize the sugar on top of the cheesecake. Make sure to keep the torch on the lowest setting to prevent the cheesecake from burning.
- Allow the caramelized sugar to harden by sitting for approximately 5 minutes and then the cheesecake is ready to slice, serve and enjoy!

This looks fancy but it was easy to make. We enjoyed it!