Pumpkin Pie Rice Krispie Treats are a fun and festive no-bake dessert made with classic marshmallow cereal bars shaped and decorated to look like pumpkin pie. A simple, kid-friendly treat perfect for fall parties and Thanksgiving.
Pumpkin Pie Rice Krispie Treats put a festive twist on the classic cereal bar by shaping them to look like slices of pumpkin pie. Made with gooey marshmallows, crispy rice cereal, and a hint of fall flavor, they’re a fun and easy treat for holiday gatherings.
This no bake dessert recipe for Pumpkin Pie Rice Krispie treats is the kid’s new favorite dessert to eat at Thanksgiving.
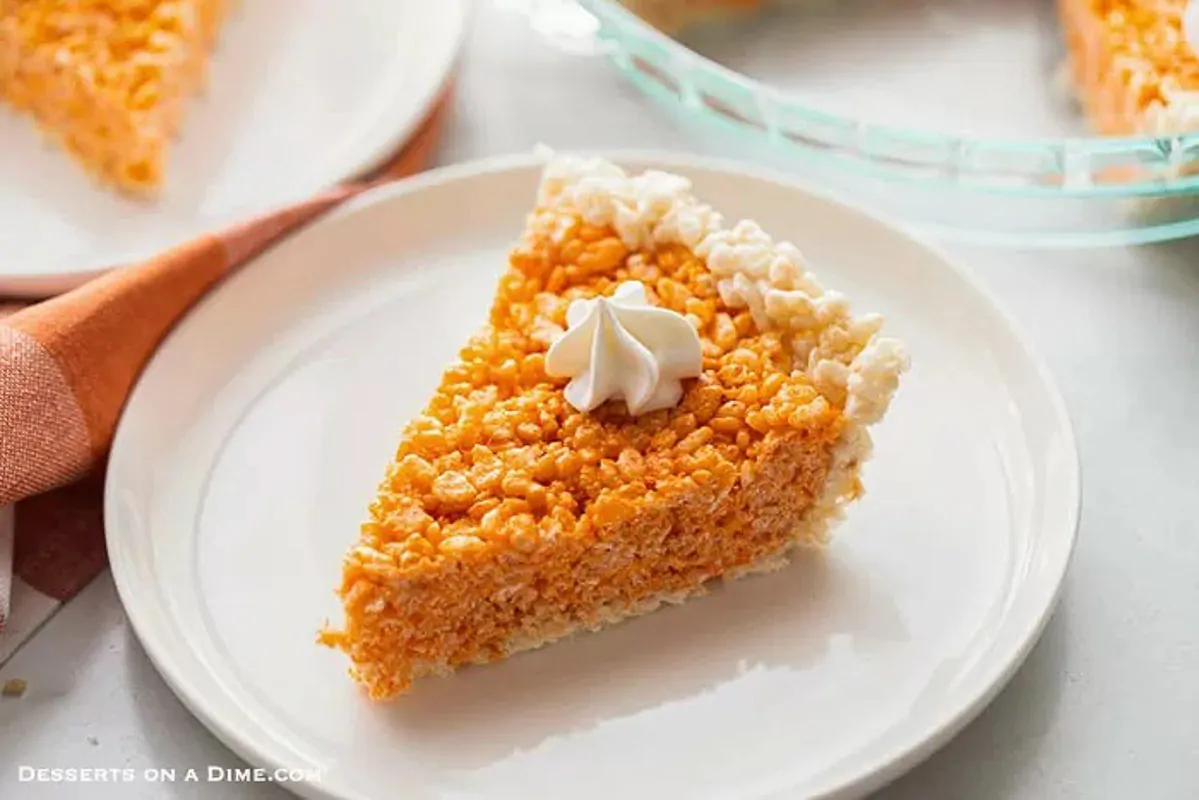
It is so cute and looks darling sitting on the dessert table. I like to go ahead and slice it and place on individual plates for serving. Add a dollop of whip cream and it really looks like pumpkin pie!
For even more tips and tricks, learn how to make rice krispie treats.
Table of contents
Why We Love This Recipe
- Festive & Fun – Shaped like pumpkin pie slices, they’re perfect for holiday parties.
- Easy to Make – No baking required and ready in under 30 minutes.
- Kid-Friendly – A treat that kids can help make and decorate.
- Seasonal Flavor – Brings cozy fall vibes with every bite.
Ingredients
- Rice Krispie Cereal – gives the classic crunchy texture.
- Butter – adds richness and helps bind everything together.
- Mini Marshmallows – the gooey base that holds the treats.
- Orange Food Coloring – creates that fun pumpkin pie look.
- Whipped Cream (Optional) – a sweet topping for serving. Try Homemade Whipped Cream.
Get the entire ingredient list at the bottom of the page.
Variations
- Spice – You can add pumpkin pie spice to the recipe if you want these to have pumpkin flavor.
- Maple Syrup – To add a warm flavor to these Thanksgiving dessert, mix in maple syrup to the butter mixture.
- Melted Chocolate – For add flavor, you can drizzle melted chocolate over the top of the treats.
- Pie Plate – We made this home recipe in a pie plate. But you can easily make it in a cake pan if you prefer.
Step By Step Instructions
- Step 1 – Prepare Baking Dish – Spray a pie pan with a non-stick cooking spray.

Step 2. Then melt approximately ⅓ of the bag of marshmallows with 1 Tablespoon of butter. Melt in the microwave in a microwave safe.

Step 3. In a mixing bowl, place 2 cups of the Rice Krispie Cereal. Stir this mixture into the mixing bowl with the cereal. Combined until well blended.
- Step 4. Press this rice krispie treat mixture firmly into the bottom of the pie pan. Make it thicker around the outside of the pan for the crust of the pie.
- Step 5. Then place the remaining rice krispie cereal in a large mixing bowl.

Step 6. Then melt the remaining butter and marshmallows in a microwave safe dish. Add in the orange food coloring and stir until it’s a bright orange color. Stir in the orange marshmallow crispy rice cereal mixture into the mixing bowl of cereal.

Step 7. Press mixture into pan. Allow to cool at room temperature for at least 30 minutes. Cut like a pie and top each piece with whipped cream before serving. You can also sprinkle each slice with cinnamon or nutmeg for pumpkin spice rice krispie treats.

Expert Tips
- Prepare the Pan – Spray your baking dish with cooking spray before adding the mixture. This makes serving easier and keeps cleanup simple.
- Mix Thoroughly – Be sure all the cereal is evenly coated with the melted marshmallow mixture for the best texture.
- Cooling – Let the treats cool completely at room temperature. Avoid refrigerating, as it can make them too hard.
- Use Parchment Paper – Press the mixture into the pan using a piece of parchment paper to keep your hands clean and prevent sticking.
- Add Fun Toppings – While the orange color is festive, you can also decorate with sprinkles, candy eyes, or other fun toppings.
- Fresh Ingredients Matter – Fresh marshmallows and cereal melt and mix more smoothly, giving you softer, tastier treats.
Storage
Room Temperature: Keep in an airtight container up to 3 days.
Layering: Place parchment paper between layers to prevent sticking.
Avoid Refrigeration: Refrigerating can make the treats too firm and lose their chewy texture.
Freezing: Wrap individually in plastic wrap, place in a freezer-safe bag, and freeze for up to 6 weeks. Thaw at room temperature before serving.
Try More Rice Krispie Treats Recipes
- how to make Rice Krispie Treats
- Red White and Blue Rice Krispie Treats
- Chocolate Covered Rice Krispie Treats Recipe
- Pumpkin Rice Krispie Treats
- Monster Eye Ball Rice Krispie Treats
More Thanksgiving Treats
- Thanksgiving Cake Pops Recipe
- Sugar Cookie Thanksgiving Recipe
- 35 Cut Thanksgiving Desserts for Kids
Get started making thanksgiving rice krispie treats today. Please come back once you do and leave a comment.

Pumpkin Pie Rice Krispie Treats
Ingredients
- 6 cups Rice Krispie Cereal
- 3 Tablespoons Butter
- 10 ounce package of Marshmallows
- Orange Food Coloring
- Whipped Cream Optional
See how we calculate recipe costs.
Instructions
- Spray a pie pan with a non-stick cooking spray.
- In a mixing bowl, place 2 cups of the Rice Krispie Cereal.
- Then melt approximately ⅓ of the bag of marshmallows with 1 Tablespoon of butter in the microwave in a microwave safe.
- Stir this mixture into the mixing bowl with the 2 cups of rice krispie cereal. Stir until the ingredients are thoroughly combined.
- Press this rice krispie treat mixture firmly into the bottom of the pie pan. Just line the bottom of the pie pan and make it thicker around the outside of the pan for the crust of the pie.
- Then place the remaining rice krispie cereal in a large mixing bowl.
- Then melt the remaining butter and marshmallows in a microwave safe dish. Add in the orange food coloring and stir until it’s a bright orange color.
- Stir in the orange marshmallow mixture into the mixing bowl with the remaining rice krispie cereal and stir until thoroughly combined.
- Add the orange rice Krispies treats into the pie pan on top of the non-colored rice krispie treats. Press them down.
- Allow them to cool at room temperature for at least 30 minutes- 1 hour (do not refrigerate).
- Cut like a pie and top each piece with whipped cream before serving!
