
These Thanksgiving Cake Pops are little turkeys made from spice cake, cream cheese frosting, and a chocolate coating, with candy corn tail feathers and candy eyes. They cost about $0.60 per serving and kids love to help decorate them.

Thanksgiving is one of my favorite times to get everyone together in the kitchen, and these cake pops are a fun project to make with my kids. We love putting together little turkey treats before dinner and seeing all the different personalities that show up in the finished cakes.
Why You’ll Love This Recipe!

- Bite-Sized Fun: Easy for kids and adults to grab and enjoy.
- Easy to Make: Simple ingredients and straightforward steps make these easy to put together.
- Great for Thanksgiving: A fun addition to your Thanksgiving dessert table or fall gatherings.
- Starts with Cake Mix: The spice cake gives you a fall flavor with no from-scratch baking.
- Make Ahead: Make them the day before so Thanksgiving Day is one less thing.
I’ve made a lot of desserts over the years, and I enjoy finding ways to turn familiar recipes into something a little more fun for the occasion. These cake pops are a great example of how a simple boxed cake mix can become a festive dessert that feels special on the Thanksgiving table.
We make them every year alongside our Turkey Cake and Turkey Cupcakes.
Ingredients
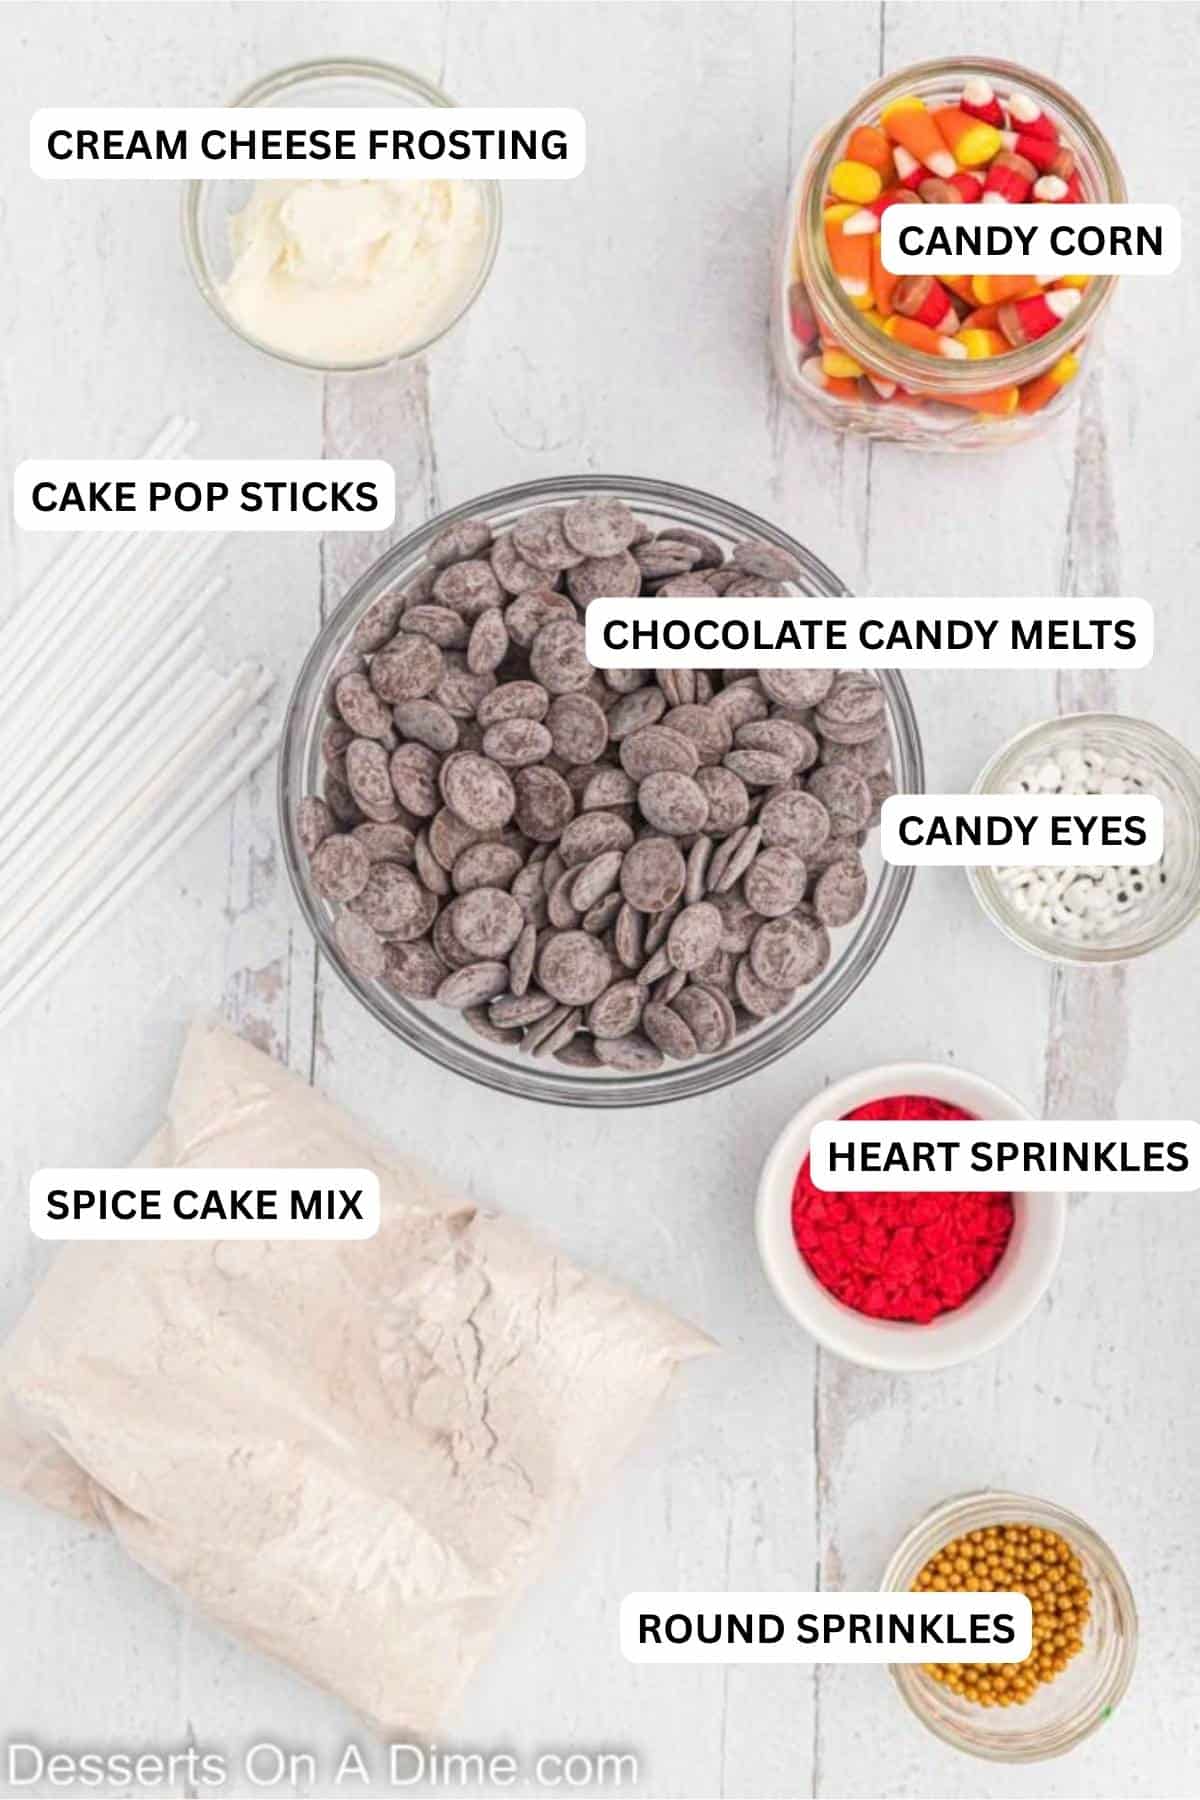
- Spice Cake Mix. Plus, the ingredients to prepare the cake on the back of the box. Most boxes are now 13.25–15 ounces; either works, but a smaller box may make a few less cake pops.
- Cream Cheese Frosting. I use store-bought to save time, or make our Homemade Cream Cheese Frosting Recipe. Start with the amount in the recipe card and add more a spoonful at a time only if needed. The mixture should feel like damp sand and hold its shape when you squeeze it. Too much frosting makes the cake balls soft and heavy, and they’ll slide off the sticks.
- Candy Corn: These create the turkey’s colorful tail feathers and add a sweet crunch.
- Candy Eyes: Small candy eyes bring the turkey faces to life and are easy to find in the baking aisle.
- Red Heart Sprinkles: These make the turkey’s red snood. A small red candy can also be used.
- Round Sprinkles: Use these for the turkey’s beak. Any color will work.
- Cake Pop Sticks: These make the cake pops easy to hold and help keep them together.
- Chocolate Candy Melts: These provide a smooth chocolate coating and make dipping the cake pops simple.
Find the complete list of ingredients at the bottom of the page.
How To Make Thanksgiving Cake Pops
Step 1. Prepare the cake. Make cake and bake according to box instructions in a 9X13 pan. Then let the entire cake cool at room temperature.

Step 2. Remove the cake from the pan and trim off the browned outer edges and top. The crusty edges don’t blend smoothly and can make the cake pops lumpy. Crumble the soft center into a large bowl.

Step 3. Add the cream cheese frosting to the crumbled cake. Stir everything together until the cake crumbs are well combined.

Step 4. Form the cake balls. I like to use a cookie scoop to shape the mixture into 1-inch cake balls. Then place on a wax paper lined baking sheet.

Step 5. Melt the chocolate candy melts in a microwave-safe cup in 30-second bursts, stirring between each, until smooth. Dip the tip of each cake pop stick about ½ inch into the melted candy, then push it about halfway into a cake ball. The candy acts like glue as it sets. Freeze for 10–15 minutes — no longer, or the coating will crack when it hits the cold cake.

Step 6. Dip each chilled cake pop straight down into the melted candy until the coating meets the stick, then lift it straight up. Don’t swirl it around because that can loosen it from the stick. Gently tap the stick on the edge of the cup to let the extra drip off.

Step 7. Before the coating sets, decorate each one with 3 candy corn tail feathers, 2 candy eyes, a round sprinkle beak, and a red heart for the snood. Work on a few at a time, the coating firms up quickly.”
Pro Tips
- Thin the Chocolate: If the candy melts are too thick, stir in 1 teaspoon of vegetable shortening or coconut oil at a time until smooth enough for dipping.
- Keep Hands Lightly Greased: Spray your hands lightly with nonstick cooking spray before shaping the cake balls to keep the mixture from sticking.
- Use Tweezers: Tweezers can make it easier to position the small candy eyes and sprinkles.
- Use a Double Boiler: If you prefer not to use the microwave, melt the candy coating in a double boiler over low heat, stirring until smooth.
Cake Pop Troubleshooting
- Falling off the stick? Dip the stick in melted candy first and chill the balls before dipping.
- Coating cracked? The balls were too cold. Chill only 10–15 minutes.
- Coating too thick or lumpy? Stir in a little shortening or coconut oil, ½ teaspoon at a time.
- Mixture too crumbly to roll? Add frosting one spoonful at a time until it holds together like damp sand.
Substitutions and Variations
- Frosting. Anything can be used instead of cream cheese. Cinnamon Buttercream and vanilla make great options.
- Omit the lollipop stick. Skip the lollipop sticks and make these as simple cake balls for easier serving and storage.
- Cake. Swap the spice cake for chocolate, yellow, vanilla, or funfetti. Chocolate cake hides best under the chocolate coating if any cracks show.
- Candy. Use Reese’s Pieces instead of candy corn for the turkey feathers. An autumn candy corn mix also adds more fall colors.
- Chocolate. Substitute chocolate chips instead of candy melts.
Storage
Room Temperature: Store cake pops in an airtight container at room temperature for up to 2 days.
Refrigerator: Keep in the fridge for up to 1 week. Before serving, let them sit at room temperature for 10–15 minutes for the best texture.
Freezer: Cake pops can be frozen for up to 1 month. Wrap individually in plastic wrap or place in a freezer-safe container. Thaw in the fridge or at room temperature before serving.
FAQs
Yes. Make them the day before and store them in an airtight container in the fridge. See the make-ahead plan above if you want to start even earlier.
About 24 cake pops using a 1-inch cookie scoop.
Kids can crumble the cake, mix in the frosting, roll the balls, and add the decorations. I handle the melted candy and the dipping, since it’s hot and the timing matters.
Yes. Chocolate, yellow, vanilla, and Funfetti all work. Chocolate cake hides best under the chocolate coating if any cracks show.
More Cake Pop Recipes


Gather the kids and make these little turkeys together. It is so fun and festive. We love to make every year for a great dessert. Please leave a comment and star rating.

Thanksgiving Cake Pops Recipe
Ingredients
- 1 box Spice Cake Mix 15 oz
- *Plus ingredients to prepare the cake on the back of the box
- 1/3 cup Cream Cheese Frosting I use pre-made
- 16 oz. Chocolate Candy Melts
- 1 bag Candy Corn
- 48 Candy Eyes
- 24 Red Heart Sprinkles
- 24 Round Sprinkles any color will work
- 24 Cake Pop Sticks

See how we calculate recipe costs.
Instructions
- Make cake and bake according to box instructions in a 9X13 pan. Then let the cake cool at room temperature.
- Remove the cake from the pan. Remove the outside layer from the cake and throw it away. Crumble up the remaining cake into a large bowl.
- Add the cream cheese frosting to your crumbled cake and stir everything together until well combined.
- Shape mixture into about 24-36 cake balls (depending on their size) and place on a lined cookie sheet. I used a cookie scoop to ensure that each one is approximately the same size.
- Put the chocolate candy melts in a small microwave safe bowl and microwave for 30 seconds, then stir. Then continue to heat in 30 second intervals stirring between each one until the candy melts are fully melted and creamy.
- Dip each cake pop stick into the melted candy and then place them into the cake balls about halfway into the balls. Then place in the freezer for 10-15 minutes (do not freeze for longer than 15 minutes).
- After the cake pops have been chilled, dip each cake pop into the melted candy melts (you may need to re-melt it if it has solidified some). Make sure that the candy covers the cake pop completely. Allow the excess melted candy to drip off back into the bowl.
- Then place the stick of cake pops in a block of styrofoam.
- Before the coating sets, decorate each one with 3 candy corn tail feathers, 2 candy eyes, a round sprinkle beak, and a red heart for the snood. Work on a few at a time because the coating firms up quickly.
- Continue until all the cake pops have been covered in the chocolate and decorated.
- Let all the cake pops completely set and then they are ready to serve and enjoy!
