We are going to show you how to make best rice krispie treats that are so delicious you won’t ever buy store bought again. This dessert is super easy to make and very frugal. Let the kids help and watch these disappear.

Rice Krispy Treats make such a classic treat. As a busy mom, I can make this quickly for a snack. I even make variations such as Peanut Butter Rice Krispie Treats,
Cookie Butter Rice Krispie Treatsand Snickerdoodle Rice Krispie Treats. The options are endless for this no bake recipe.
Why we love this recipe
The recipe is budget friendly to make and so delicious. Anyone can make a large pan of these without much work. The gooey marshmallow combined with crispy cereal make a luscious dessert. Each bite is soft and chewy.
It’s also good with Chocolate Fondue Recipe.
Ingredients
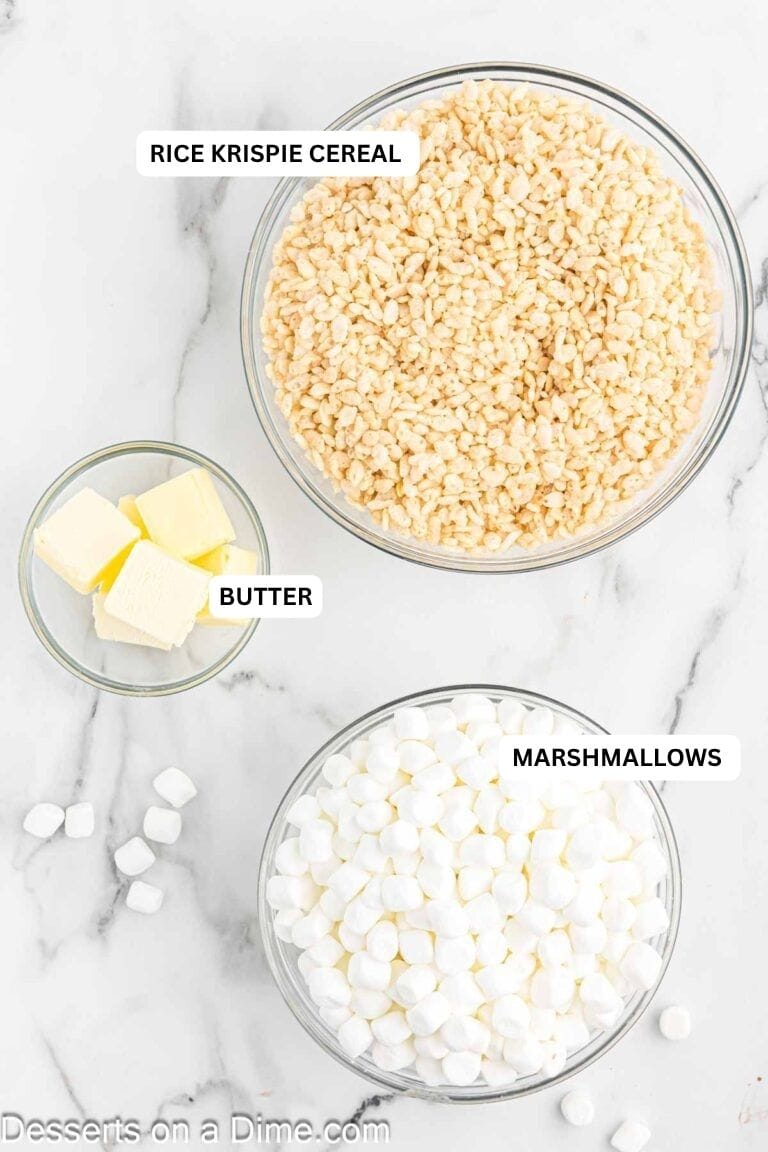
- Rice Krispie Cereal
- Butter
- Marshmallows
Get the complete recipe list at the bottom of the page.
Variations
The possibilities are endless for these delicious little treats. You can easily modify these for seasonal treats, holidays, birthdays and more.
We have even made them in team colors for our favorite sports team. Get creative with these delicious treats.
- Add sprinkles to the top- holiday, birthday or anything you like.
- Make the treats in different colors. This would be fun for baby showers, birthdays and so much more.
- Use cocoa krispies to make a fun and tasty chocolate treat.
- You can try using different colored marshmallows to jazz things up.
- Add chocolate chips to the mixture. Yum!
- Try peanut butter morsels.
- Drizzle chocolate on top.
There are so many great ideas!
How to Make Rice Krispie Treats
- Step 1. Prepare the pan with non-stick cooking spray.

Step 2. Melt the butter in a large saucepan over medium heat.

Step 3. Add the marshmallows and stir with the melted butter.

Step 4. Heat and stir the mixture until completely melted.

Step 5. Next, remove from the heat and gradually add in the cereal.

Step 6. Mix until completely coated in the marshmallow mixture.

Step 7. Finally, spread the cereal and marshmallow mixture evenly into the prepared pan. I like to use a rubber spatula to spread the mixture.

Step 8. Allow to cool and cut into squares.

Step 9. Serve and enjoy.
FAQs
Make sure to cook this over low heat. Increasing the heat will result in hard or tough treats that will not be soft like desired.
It could also be if you are pressing too hard when evenly spreading out the treats. Gently pressing the cereal mixture will help keep the treats soft.
Do not store in the refrigerator. They are best left to cool at room temperature so that the remain gooey and delicious!
If you store the rice krispie treats in a container , they will last about 3-4 days. Ours never last that long though because we eat them so fast. Also, use wax paper in between the treats to keep them from sticking.
These Rice Krispie treats are not gluten free. Rice Krispie Cereal contains malt flavor according to their ingredients. Malt flavor contains barley, which is part of a grain which contains gluten.
However, you can purchase crispy rice cereal that is gluten free.
We do not recommend freezing these treats. They are best served fresh. See Can You Freeze Rice Krispie Treats for more information.
Yes, just make sure to use a microwave safe bowl when heating the butter and marshmallows. This usually takes about 3 minutes but can vary based on your microwave.
Tips for Success
- Parchment Paper – To easily lift treats out of the pan, use parchment paper.
- Use Fresh Ingredients – When making these treats always use fresh marshmallows and cereal. The treats will taste better and last a lot longer.
- Add Extra Marshmallows – We love adding in extra cups of mini marshmallows. In fact, adding in a cup of marshmallows when you are mixing the treats together gives it more of a marshmallow taste.
- Vanilla Extract – Adding vanilla extract adds so much flavor to these treats
- Gently Press into Pan – Make sure to use your hands or spatula to press into pan so the treats remain soft.

More Rice Krispie treats to try
- Rice Krispie Treats with Marshmallow Fluff
- Monster Rice Krispie Treats
- Strawberry Rice Krispie Treats Recipe
- Butterscotch Rice Krispie Treats
- Chocolate Chip Rice Krispie Treats
- Neapolitan Rice Krispie Treats
Make homemade rice krispie treats today. Please leave a star recipe rating once you do.

How to make Rice Krispie treats
Ingredients
- 12 cups Rice Krispie Cereal
- 6 Tablespoons Butter
- (2) 10 ounce package of Marshmallows
See how we calculate recipe costs.
Instructions
- Lightly coat a 9×13-inch baking dish with nonstick cooking spray and set aside.
- In a large saucepan, melt 6 tablespoons butter over low heat.
- Add two 10-ounce packages marshmallows and stir continuously until completely melted and smooth.
- Remove the saucepan from the heat and gradually stir in 12 cups Rice Krispies cereal until the cereal is evenly coated with the marshmallow mixture.
- Transfer the mixture to the prepared baking dish. Lightly grease a spatula or your hands with cooking spray and gently press the mixture into an even layer without packing it too firmly.
- Let the treats cool completely at room temperature before cutting into squares and serving.
- Store leftovers in an airtight container at room temperature for up to 3 days.
- *Do not store in the refrigerator. They are best left to cool at room temperature so that the remain gooey and delicious!

These turn out amazing better then what i thought they was going to
These are a favorite in our home – I love coming to this recipe and seeing the different suggestions for add-ons. So yummy! A never fail go to recipe!