
This Oreo Pudding Pie is an easy no bake dessert made with just 5 ingredients, including pudding, Cool Whip, Oreos, and whipped cream. It’s the dessert I reach for when I need something easy that still looks (and tastes) like I spent more time on it than I did.

After many years of making recipes for my family, I’ve learned that the desserts people remember most don’t have to be complicated. When I’m hosting a holiday party or family gathering, I love having an easy dessert like this Oreo Pudding Pie that I can put together earlier the same day and have chilling in the fridge, ready to go by the time guests arrive.
Why You’ll Love This Recipe!

- 5 simple ingredients, plus a 3-ingredient topping – Everything comes from the grocery store’s regular aisles, no specialty items needed.
- Two-layer texture – A light, mousse-like pudding filling topped with real hand-whipped cream for a bakery-style finish.
- No oven required – Ready for the fridge in about 15 minutes of hands-on time.
- Budget-friendly – At just $11.13, a full 8-slice pie costs a fraction of a similar pie from a bakery case.
Ingredients
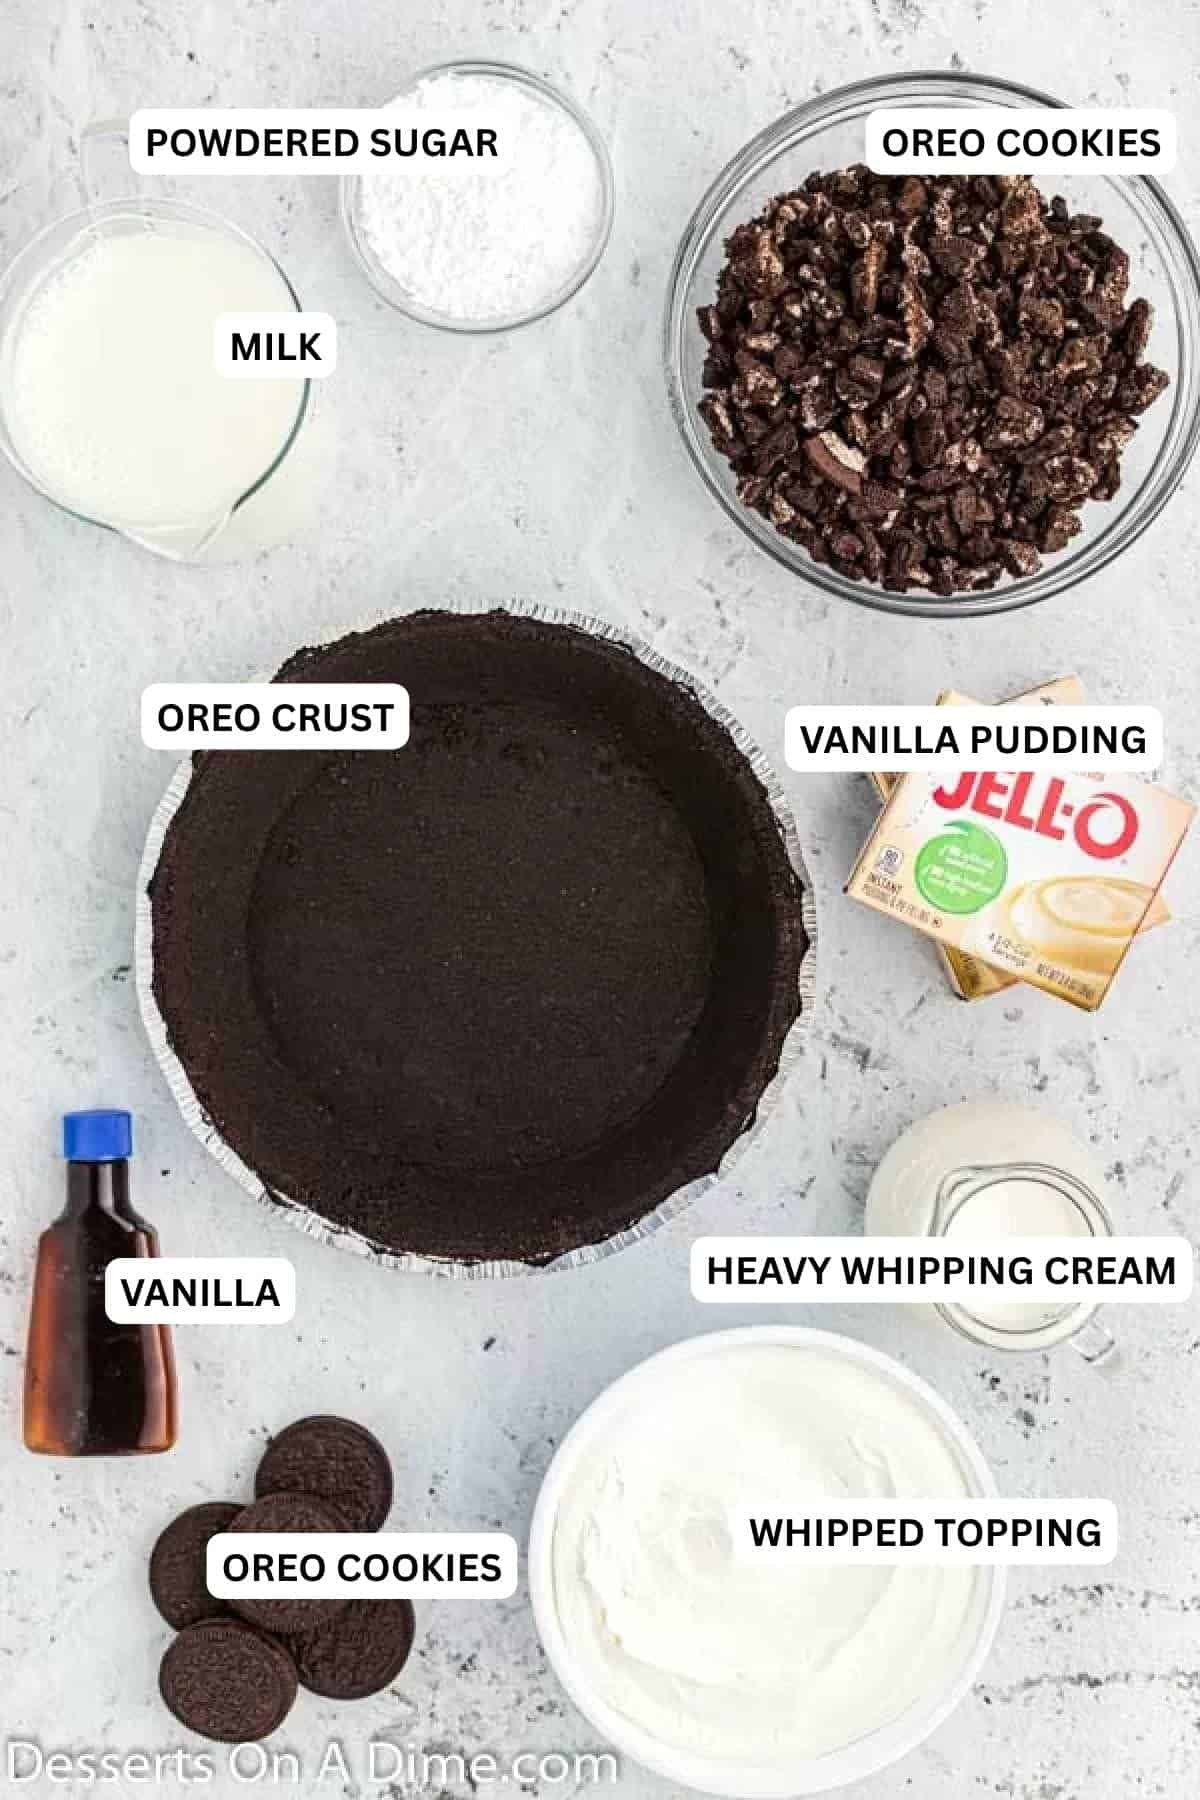
Pie
- Oreo Pie Crust. We used a store-bought crust.
- Instant Vanilla Pudding Mix. Make sure you’re using the small 3.4 oz boxes of instant pudding, not the larger 5.1 oz family-size boxes — using the wrong size will throw off how thick the filling sets.
- Oreo Cookies. Crushed into pieces.
- Whipped Topping. We used Cool Whip, but store brand is fine too.
Topping
- Heavy Whipping Cream. Starting cold — and even chilling your mixing bowl and beaters for a few minutes first — helps the cream whip up to stiff peaks faster and hold its shape once it’s on the pie.
- Powdered Sugar. You may need to sift the powdered sugar if it is lumpy.
- Oreo Cookies. Crushed for topping.
Skip to the bottom for the complete ingredient list.
How to Make Oreo Pudding Pie

Step 1. Whisk together the instant pudding mix with the milk in a large mixing bowl until it starts to thicken slightly, about 2 minutes — it won’t be fully set yet, just noticeably thicker than when you started.

Step 2. Once combined, gently fold in the whipped topping — fold, don’t stir, so you don’t knock the air out of it and end up with a denser filling. Then carefully mix in the Oreo crumbs into the remaining pudding. You can use a food processor to crush the cookies. If you do not have one, place them inside a ziploc bag. Finally, pour the pudding filling into the pie pan.

Step 3. Make the topping using a chilled bowl. Pour the heavy whipping cream, powdered sugar and vanilla extract into the bowl. Use a stand up or hand held mixer for 4 to 5 minutes until stiff peaks start to form — the cream should hold its shape when you lift the beaters out, rather than folding back over on itself. Place the whipped cream in the pudding layer.

Step 4. Pour everything into the pie crust. Smooth with a spatula so it’s even. Then put the crushed Oreos on top of the pie. Allow to chill for 2 hours, or until the filling is fully set and no longer jiggly in the center.
For Cleaner Slices
Pop the pie in the freezer for about 20 minutes right before serving. It firms the filling up just enough to cut neat slices instead of a soft scoop — and a knife warmed under hot water helps too.
Variations
- Change the pudding flavor. Chocolate pudding makes this a Chocolate Pudding Pie; cheesecake or white chocolate pudding both work well too.
- Change the Oreo flavor. Golden Oreos, Red Velvet Oreos, or Mint Oreos all swap in easily — just match them with a complementary pudding flavor (Golden Oreos + vanilla, Red Velvet + cheesecake pudding, Mint + chocolate pudding).
- Swap the crust. A plain graham cracker crust gives less Oreo flavor if you want it milder; a chocolate crust or gluten-free crust both work as substitutes.

FAQs
It is optional but even more delicious served with a dollop of whipped cream. We also like to put a whole Oreo cookie on top of each slice.
Another tasty idea to try includes mini Oreo cookies. It looks really pretty and tastes great too.
Leftovers need to be covered and refrigerated. They will keep up to 5 days.
If you have a pie carrier, those work great for storage. If I am taking the pie somewhere, I use one of these. They are really handy.
It’s best eaten fresh — the Oreo crust starts absorbing moisture from the filling the longer it sits, which softens the crust from a crisp cookie base into something closer to mush. I make mine the morning of or up to about 6 hours before serving; the filling needs a minimum of 2 hours in the fridge to set anyway, so this fits naturally into same-day prep. If you need it ready further ahead than that, freeze the crust and filling separately and assemble the morning you plan to serve it instead.
You can use a food processor or blender. If you don’t have these, place inside a ziplock bag and crush with a wooden spoon or rolling pin.
I don’t recommend freezing this Oreo Pudding Pie. The pudding filling and whipped topping are designed to set in the refrigerator, and freezing can cause the texture to become watery or grainy once the pie thaws.
This almost always comes down to one of two things: using the large 5.1 oz pudding boxes instead of the small 3.4 oz size called for, or using cook-and-serve pudding instead of instant. Double-check your boxes before you start and give the pudding-and-milk mixture a full 2 minutes of whisking so it has time to thicken before you fold in the whipped topping.



Please leave a comment and star recipe rating once you make this Oreo no bake Oreo pie recipe.

Oreo Pudding Pie
Ingredients
- 1 pre-made Oreo Cookie Crust
- 2 Boxes Instant Vanilla Pudding Mix 3.4 oz each
- 4 cups Milk
- 20 Oreo Cookies crushed
- 8 oz Whipped Topping Coo Whip
- FOR THE TOPPING:
- 1 cup Heavy Whipping Cream
- 2 Tbsp Powdered Sugar
- 1 tsp Vanilla Extract
- 5 Oreo Cookies crushed

See how we calculate recipe costs.
Instructions
- Prepare the pie filling: In a large bowl, whisk together the two boxes of instant vanilla pudding mix and 4 cups of milk for about 2 minutes, or until the mixture begins to thicken.
- Gently fold the 8 ounces of whipped topping into the pudding mixture until smooth and well combined.
- Fold in the 20 crushed Oreo cookies, mixing gently so the cookies are evenly distributed throughout the filling.
- Spoon the Oreo pudding mixture into the prepared Oreo cookie crust and spread it into an even layer.
- Make the whipped cream topping: Add the heavy whipping cream, powdered sugar, and vanilla extract to a chilled mixing bowl.
- Beat with a hand mixer or stand mixer on medium-high speed for 4–5 minutes, or until stiff peaks form. Be careful not to overbeat.
- Spread or pipe the whipped cream over the top of the pie.
- Sprinkle the 5 crushed Oreo cookies evenly over the whipped cream.
- Cover and refrigerate the pie for at least 2 hours, or until thoroughly chilled and set.
- Slice and serve chilled.
