Pistachio Ice Cream has a creamy texture with a sweet and salty ice cream base. The chopped pistachios give it the perfect hint of saltiness that combines for a great treat.

This no churn ice cream recipe is really simple to make. The pistachios have a unique taste, and all of the salty pieces make each bite absolute perfection. The sweetness is from the sweetened condensed milk and the whipped cream gives it the creaminess.
It all results in the best ice cream without any ice cream maker or eggs needed. We also love Pistachio Cookies for more pistachio flavor.
More yummy recipes to try are Twix Ice Cream Recipe, Nutter Butter Ice Cream Corn Ice Cream and No Churn Chocolate Ice Cream. If I want something lighter, Fruit Ice Cream is another great recipe.
We also love to make Melted Ice Cream Cake, Rolled Ice Cream Recipe and Homemade Butterfinger Ice Cream. Mason Jar Ice Cream is also a fun recipe. I also love to make Dairy Queen Ice Cream Cake , Fried Ice Cream and Easy Chocolate Popsicle Recipe.
Table of contents
Why We Love This Recipe
- Just a few ingredients. This recipe only calls for 5 simple ingredients.
- No churn ice cream. You do not need an ice cream machine, or anything fancy for this. It is easy to make and does not contain egg yolks. Try it to make Air Fryer Fried Ice Cream.
- It is delicious. The flavor of the pistachios blended with the sweet ice cream base is fantastic. Try it with Magic Shell Recipe and Ice Cream Sundae Toppings.
Ingredients

- Heavy Cream. This gives the ice cream the fluffy texture.
- Sweetened condensed milk. The sweetness in the ice cream comes from this.
- Vanilla extract. Pure vanilla extract is suggested.
- Green food coloring. Optional but gives it such a pretty green color.
- Crushed pistachios. The star of the recipe.
Get the complete ingredients for this recipe at the bottom of the page.
How to Make Pistachio Ice Cream

Step 1. Beat the cream. Whisk the heavy cream until stiff peaks form. It should be nice and fluffy.
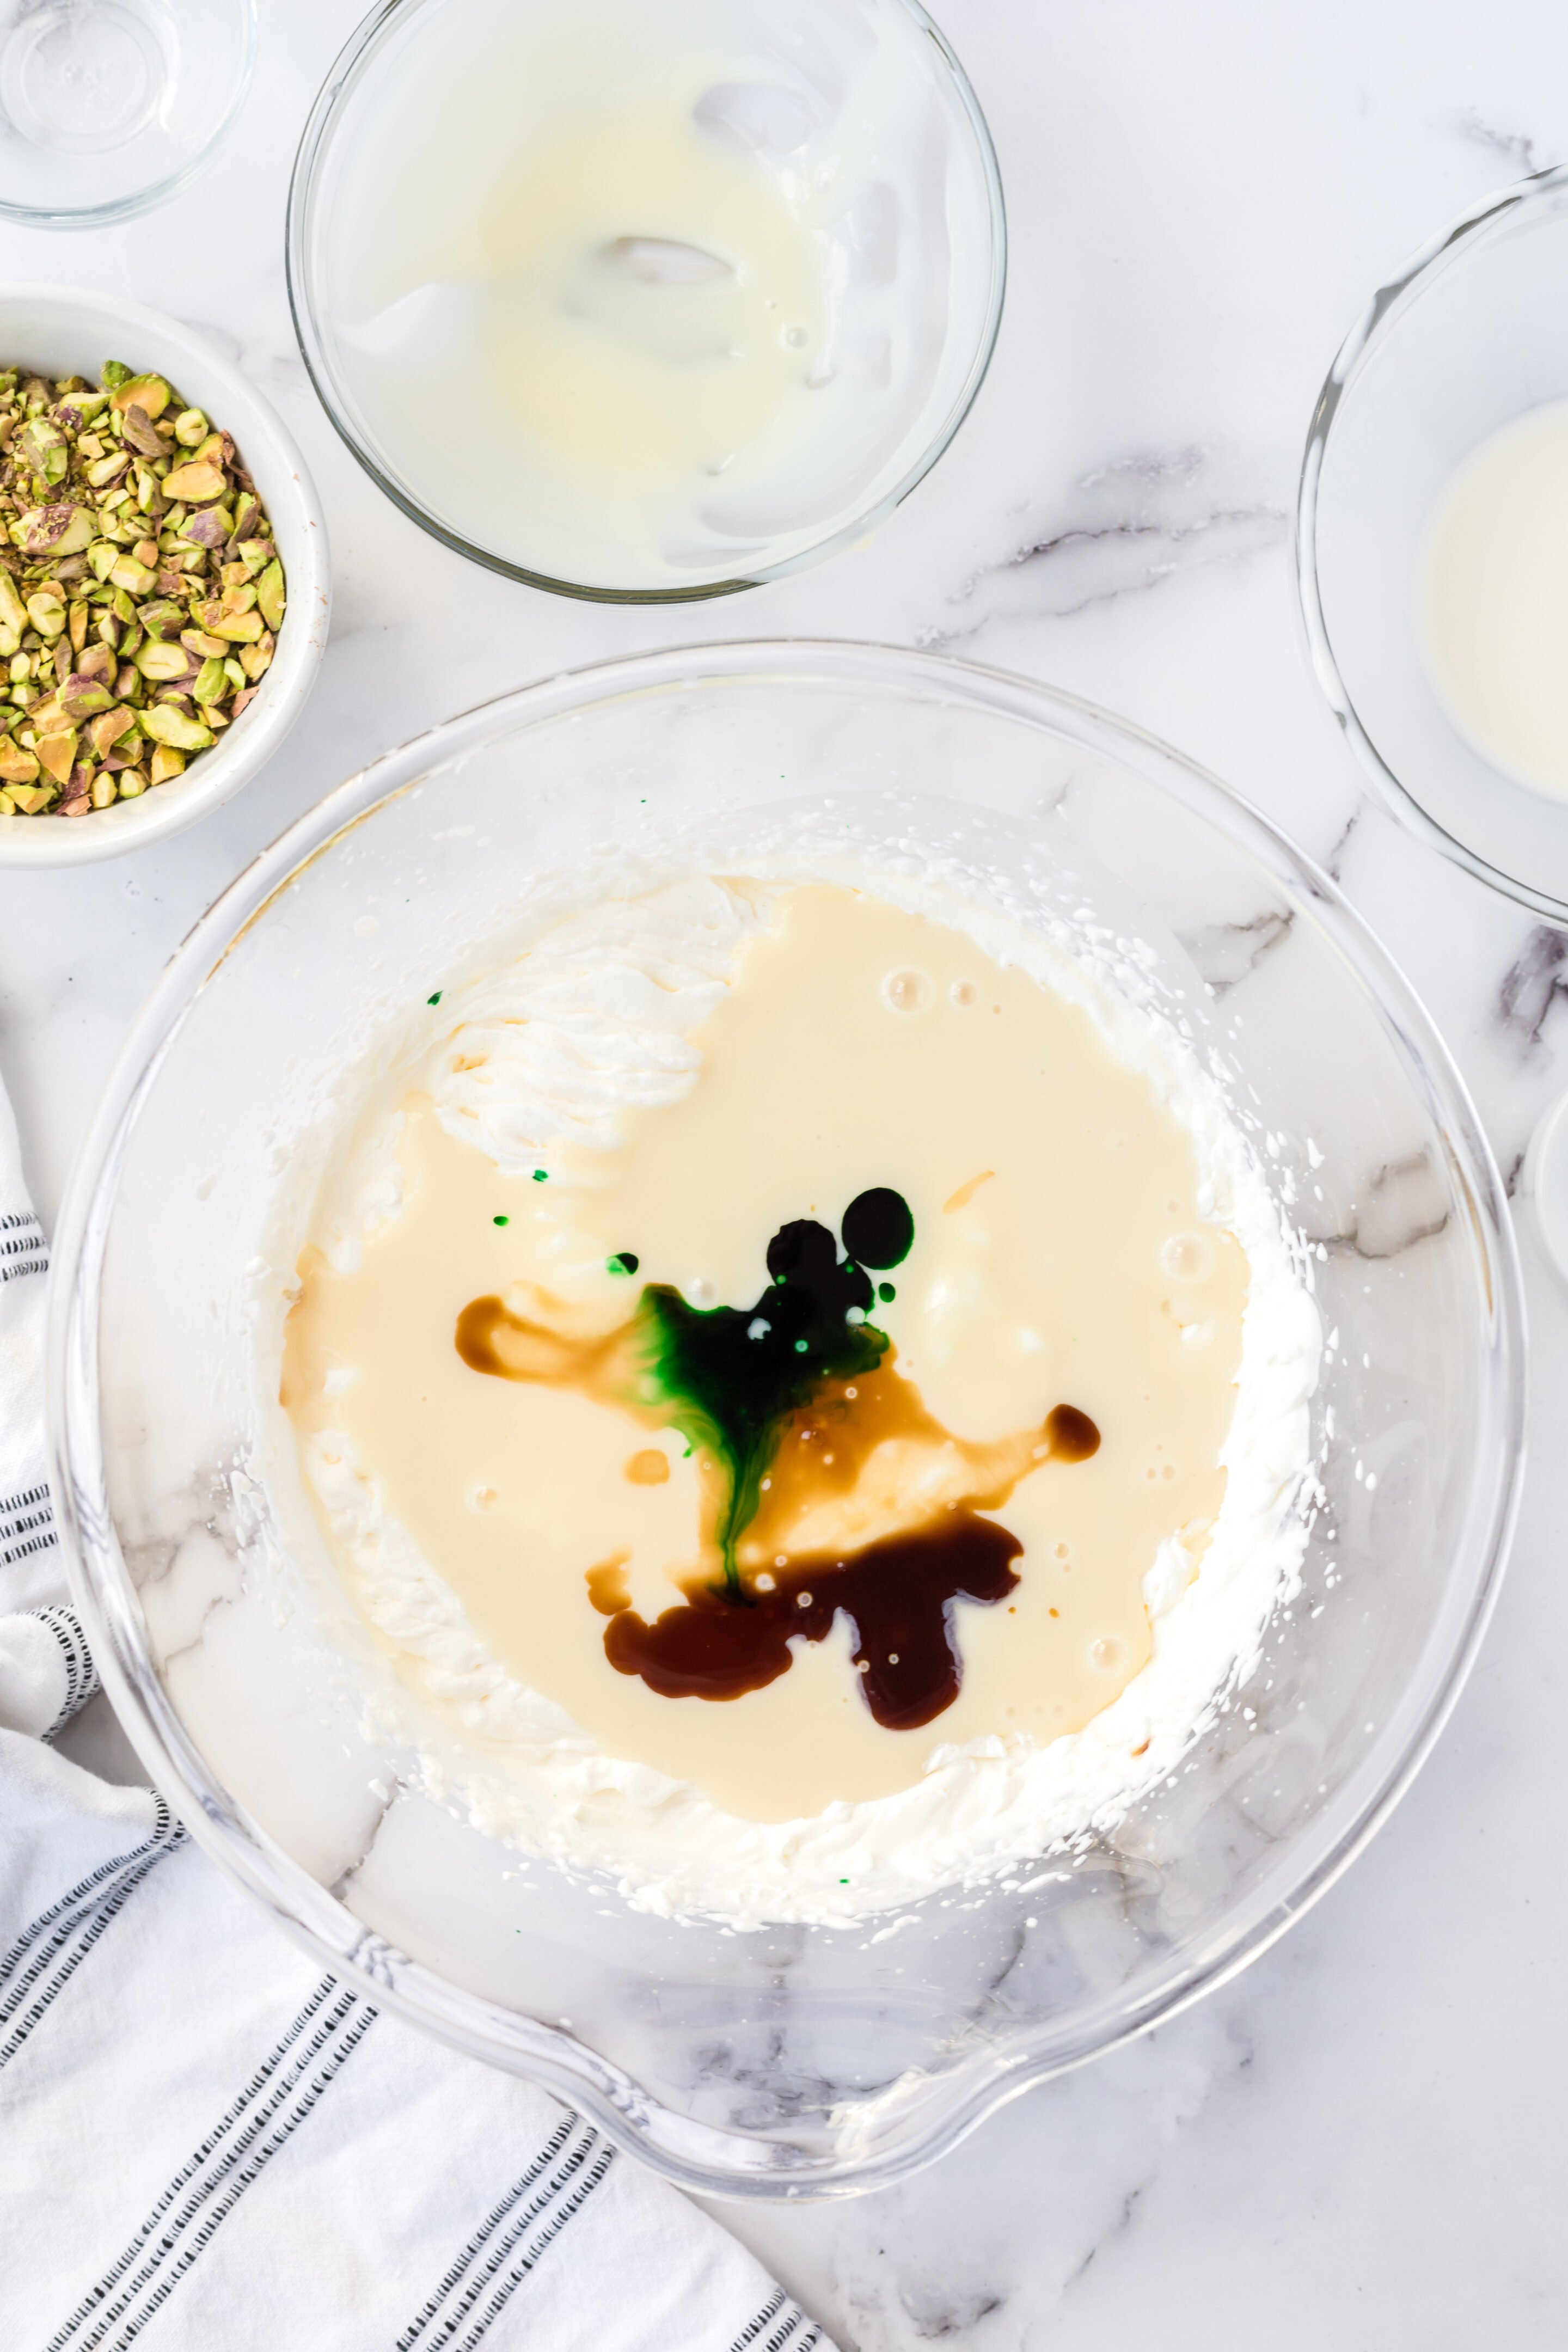
Step 2. Once whipped, add the sweetened condensed milk, vanilla, and food coloring. Use a spatula to stir the ingredients together.

Step 3. Fold in the nuts to the milk mixture and blend.

Step 4. Transfer the pistachio mixture to a pan. Cover the ice cream with plastic wrap and freeze up to five hours.
How to Serve
We love to serve this in ice cream cones or bowls. Top with more chopped pistachios for even more flavor.
The kids love it most in waffles cones. It is so tasty either way and also great on an Ice Cream Sundae Bar.

Storage
Store the ice cream covered with a lid or plastic wrap if your container does not have one. I also like to put parchment paper directly on top of the cream so that ice crystals will not form. Just make sure it is a freezer-safe container.
How Long Will Homemade Ice Cream Last?
You can store this ice cream for up to two months as long as it is covered properly. We eat ours pretty quickly because it is so delicious. It doesn’t last long because everyone loves it.
Pro Tips
- Food coloring. I like to use liquid food coloring; however, you can also use gel food coloring. If using gel, you will need about ½ tsp. Feel free to adjust the amount based on the shade of green you prefer.
- Fold the whipped cream. Folding the ingredients into the whipped cream helps limit how much air is knocked out of the whipped cream. This is important because that airy whipped cream is what gives your ice cream a smooth texture.
- Allow to soften. If you store your ice cream in a deep freezer, you may need to let the ice cream sit on the counter for a minute or two before it is ready to scoop.
- Omit food coloring. If you do not have green food coloring, it can be omitted. It just elevates the color of the ice cream. Without food coloring, you will have a very slight green tint to your ice cream, but it will taste exactly the same.
- No churn recipe. Using heavy cream and condensed milk eliminates the need to churn this ice cream. You will get a very similar texture to churned ice cream without the hassle.
- Almond extract. You can add 1 teaspoon of almond extract to this mixture if desired.
- Pistachios. Save yourself some time and buy pistachios that are already shelled. You can chop them into small pieces with a knife or use a food processor.
- Freeze. You can use a loaf pan or an ice cream freezer container if you have one.
- Mixer. It is handy to use a stand mixer or electric hand mixer to beat the heavy cream until peaks form.
More No Churn Homemade Ice Creams Recipes
- Peanut Butter Banana Ice Cream
- Puppy Chow Ice Cream recipe
- Pecan Praline Ice Cream Recipe
- Butterbeer Ice Cream
- No Churn Vanilla Ice Cream
- Kool Aid Ice Cream Recipe
Make this pistachio ice cream recipe today. Please come back and leave a star rating and comment.

Pistachio Ice Cream
Ingredients
- 2 cups heavy cream
- 1 ½ cups sweetened condensed milk
- 1 tsp vanilla extract
- 3 drops green food coloring
- ¾ cup crushed pistachios
See how we calculate recipe costs.
Instructions
- Whip the heavy cream to stiff peaks in a large mixing bowl. Once whipped, add the sweetened condensed milk, vanilla, and food coloring. Use a spatula to fold the ingredients together until the food coloring is fully incorporated and the ingredients are homogenous.
- Gently fold in the pistachios until they are evenly distributed throughout the ice cream mixture.
- Pour the ice cream into a 9×5 inch loaf pan. Cover the ice cream with plastic wrap and place it in the freezer to set for five hours, or until the center of the loaf pan is firm to the touch.
- Serve and enjoy!
